How to connect Astro to Octo Browser
06 February 2023
Octo Browser represents the last generation of antidetect browsers. Chromium-based multi-accounting solution provides a wide range of customizable fingerprints. It is compatible with the best social media proxies. Astro's data gathering and processing platform is easily integrated into the built-in manager. Save budget with the trusted proxy website sparing none on cybersecurity and reliability.
Octo Browser characteristics and trusted proxy website
The main features of antidetect browser are:
- Multiple OS compatibility (Windows x64, macOS, Linux)
- Unlimited profiles running simultaneously
- Quick profile creation
- Tags support
- High-quality fingerprint spoofing passing Pixelscan, BrowserLeaks, Whoer, and other credibility web checkers
- Flexible role settings for teamwork
- Browser API automation framework on the base of Puppeteer, Selenium, CDP
- Python, Ruby, Go and PHP programming language support
- Human typing feature to paste text
- Proxy manager with autocompleting for any residential IPs you buy
- Videostream spoofing
- Profile templates.
Octo Browser serves 5 account types with monthly payments varying from $29 to $429+ according to the features available.
There are 1 month, 3 months, 6 months, and one year subscription options. The total discount varies from 10% to 30% depending on the chosen plan. Payments are accepted via:
- Fiat currency: Visa, Mastercard
- Cryptocurrency: Bitcoin, Etherium, Litecoin, Tether, USDT (TRC20)
- E-wallets: Qiwi.
We provide our users with an exclusive 30% promo code ASTROPROXY30 for Octo Browser first-month subscription.
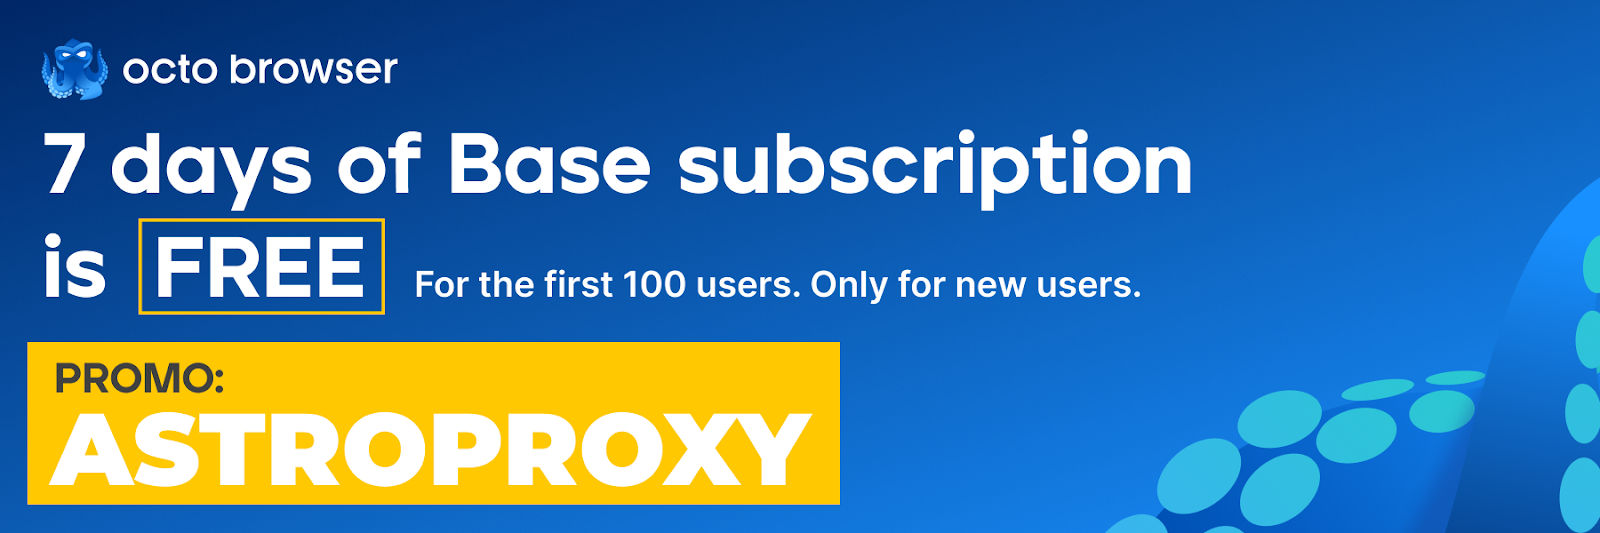
By activating it, you will be able to see for yourself that Octo Browser works perfectly with Astro. Promo code is available only for new Octo users.
If you have any questions about Octo Browser, you can contact support or browse the information on the official website.
How to buy HTTPS proxy list
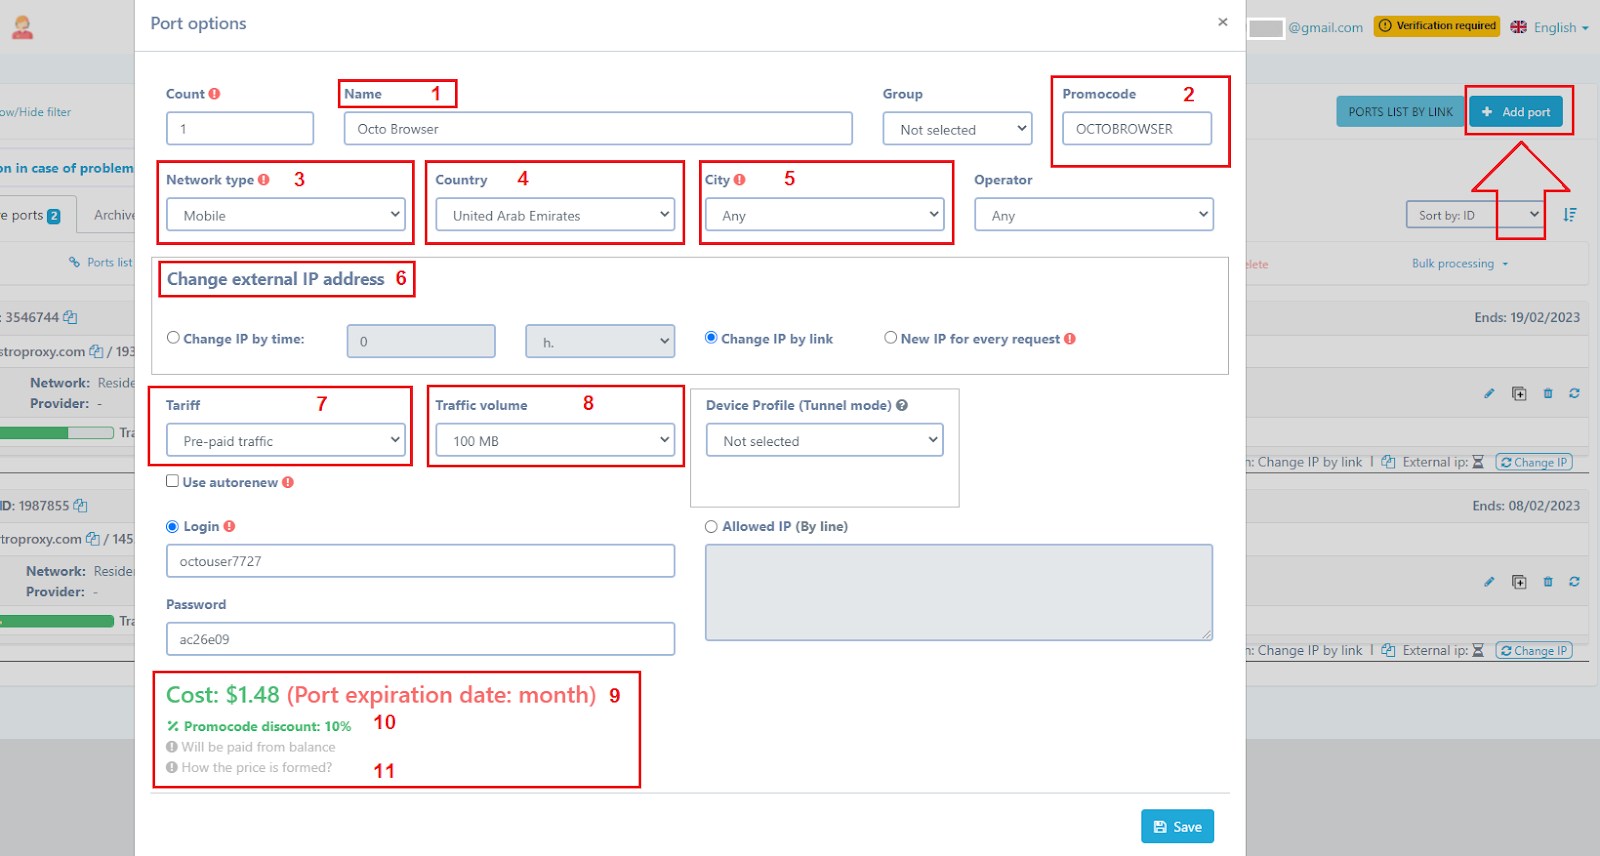
Sign up on Astro or sign in to get access to the dashboard page. Press “Add port”. The new window gives an opportunity to set up the desired IP pool. Take your pick according to the example below:
- Name of mobile, datacenter or residential IP to buy.
- Promocode OCTOBROWSER for a 10% discount.
- Proxy type.
- One of 100+ countries to choose from.
- Particular city if needed. Choosing ISP, ASN or mobile carrier on the right is optional.
- Terms to change external IP. It can be changed by link, on timer or with every new request. Parameter is adjustable even after you have bought HTTPS proxy list or SOCKS5.
- Pricing plan. Pre-paid packet of traffic is supposed to be more cost-effective in most cases.
- Amount of traffic, 100 Mb min.
- Total cost.
- Discount for all Octo Browser users.
- Detailed explanation of price, hover over it to see.
Click "Save" on completion.
How to add proxies to Octo Browser
We have two options to utilize geo targeted proxies:
- All at once as a list
- One-by-one.
The “Proxies” tab is available from the main page.
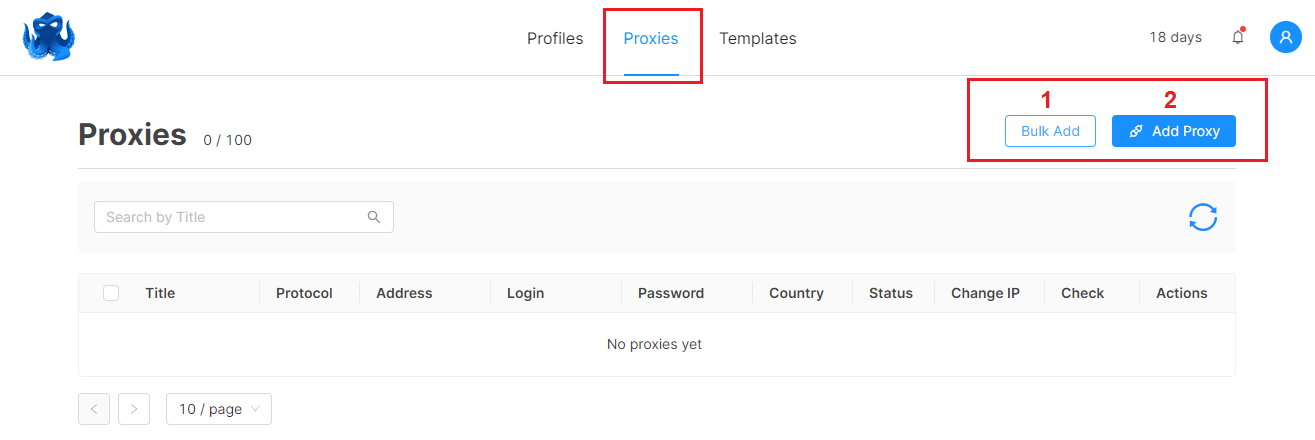
1. How to add all proxy IPs at once
Click “Bulk Add” (1) to insert the external file with the HTTPS proxy list you have bought. The “Proxy name prefix” field sets a unified designation for every IP, e.g. Astro, or “YouTube proxies”.
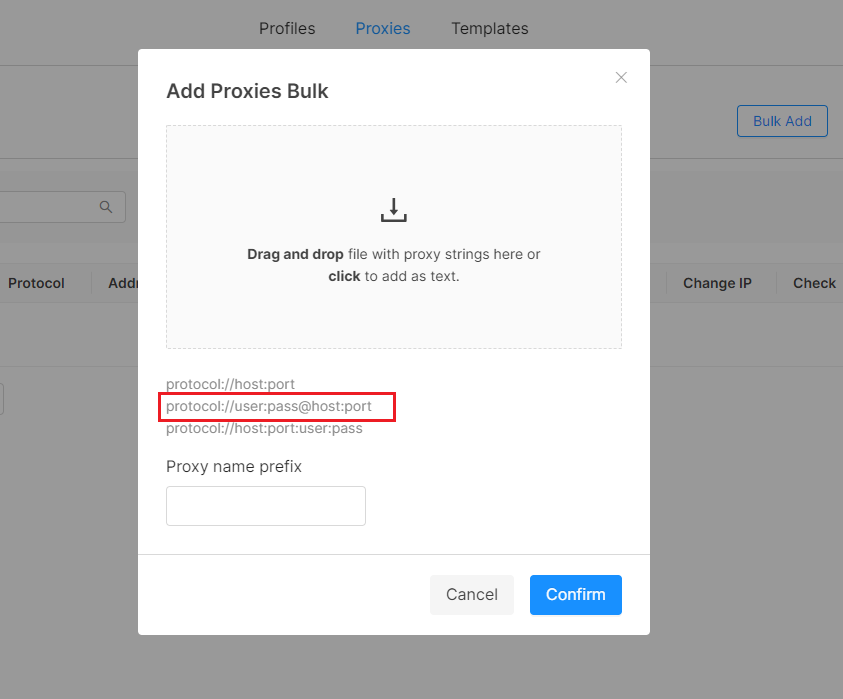
Astro is highly compatible with antidetect browsers, hence to import them it is enough to know:
- Protocol (HTTP, SOCKS)
- Username
- Password
- Host/IP
- Port.
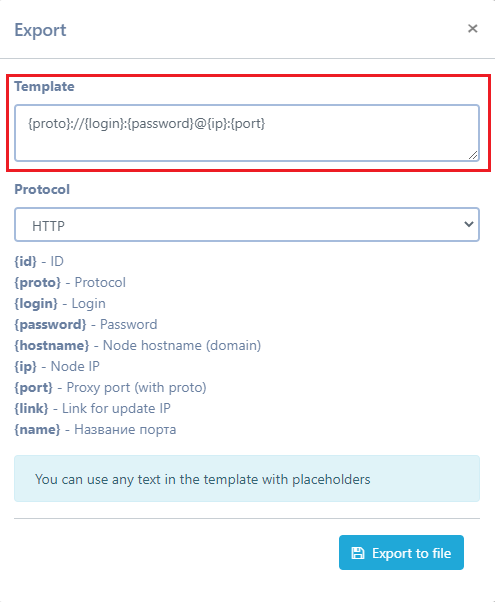
Go to your dashboard of the Astro personal account and activate the “Export to file all” option.

Get all the information mentioned above by entering “{proto}://{login}:{password}@{ip}:{port}” in the “Template” box, and press the “Export to file” button. The file called “ports.txt” will be downloaded.
Drag and drop “ports.txt” and IP attributes will be extracted and placed in the box automatically. Confirm the import.
2. How to add a single proxy port
Choose the “Add Proxy” option (2) on the relevant main menu tab.
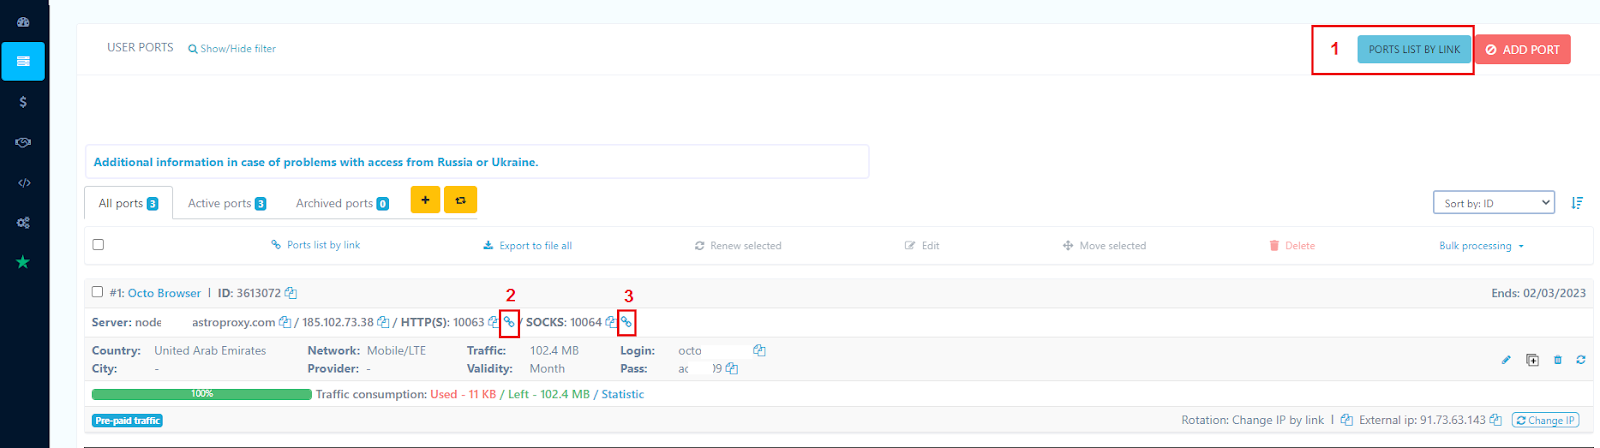
Switch to the Astro official page and open your dashboard. Copy and paste the information manually or use the following options:
- Press “Ports list by link” (1) to get a list of all IP addresses, both SOCKS5 and HTTP as a plain text.
- Click the chain symbol to put the full path and authorization data to the clipboard, (2) for HTTP protocol and (3) for SOCKS5.
Choose the suitable web protocol (1), HTTP is given as an example. Set a cursor to the marked field (2) and press CTRL+V. All boxes will be filled automatically.

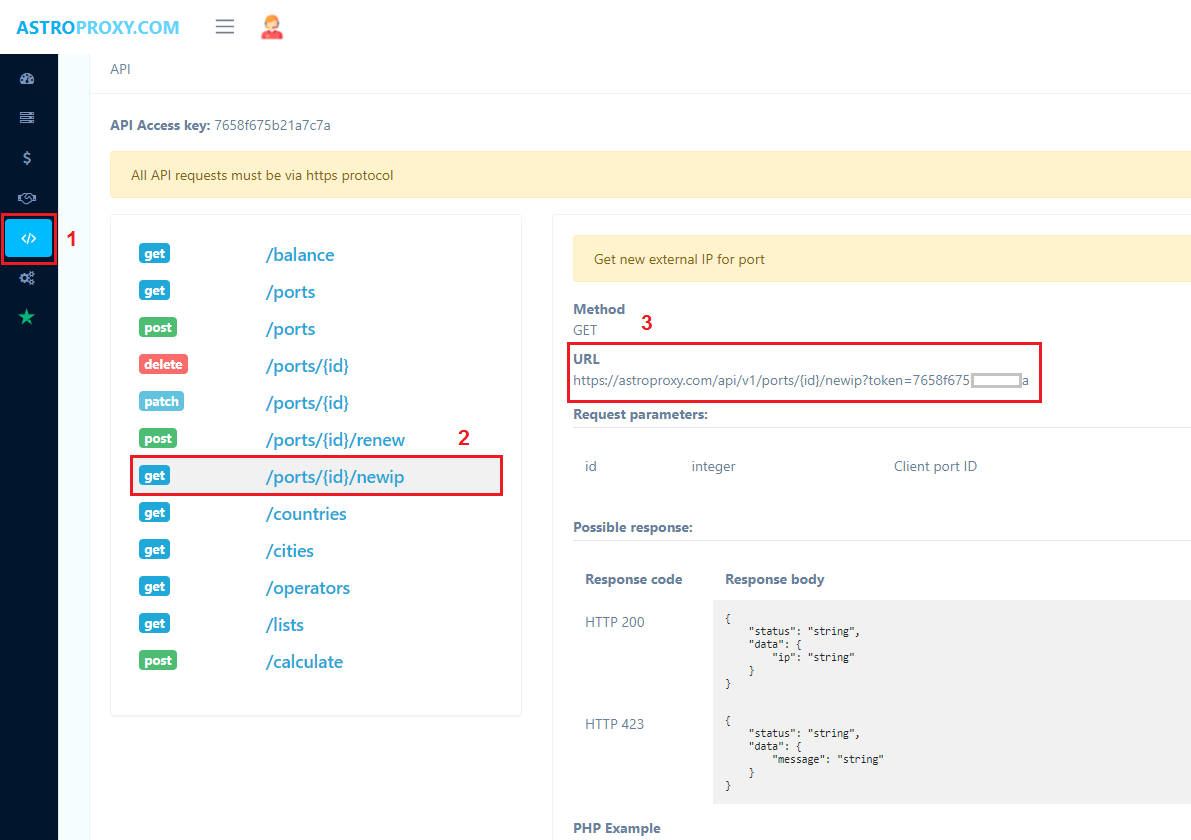
One can change external IP automatically via API. Insert token in the field (3). Check proxy’s operability (4). To get a token:
- Click the symbol of HTML tag in the menu on the left of your Astro dashboard (1).
- Go to the suitable item in the command list (2).
- Copy the URL provided (3).
Confirm your actions and the IP address will be added to the Octo Browser software.
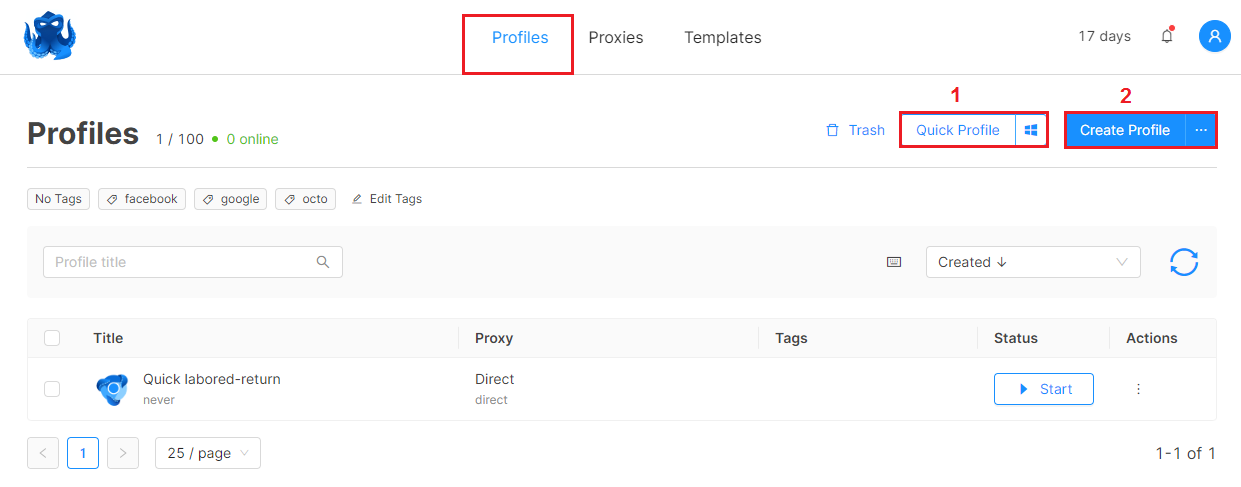
How to add proxy to a new profile
Every profile is usually assigned with an individual geo targeted proxy address for safety reasons. Go to the “Profiles” section. Make a click on the “Quick profile” button (1) to create a new ID for Windows or Linux OS with randomized settings. Otherwise, press “Create profile” (2).
Octo Browser provides a wide range of settings for each profile, including:
- Detailed hardware options (number of cores, GPU type, RAM, screen resolution)
- Customized fingerprints (WebGL, Canvas, Audio noise)
- OS features (fonts, languages, geolocation, timezone)
- Cookies import
- Individual Chrome extensions.
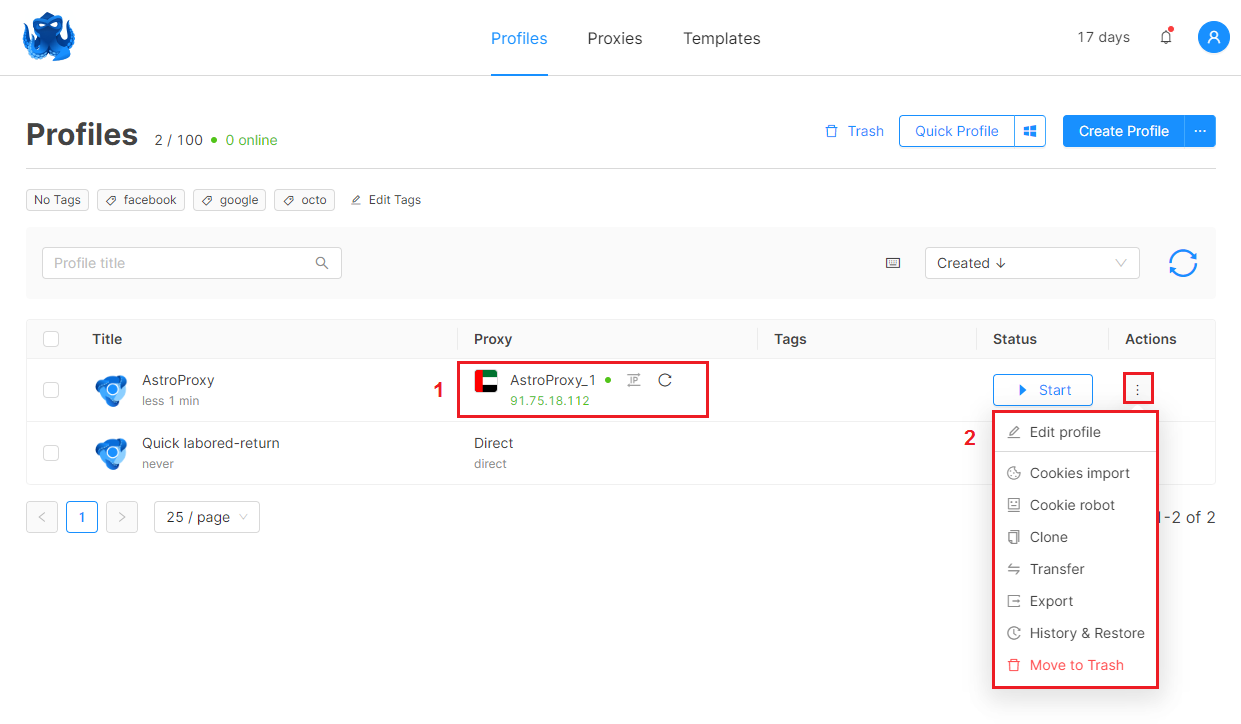
We turn our attention to the “Connection” tab, where middlebox IPs are connected to profiles. One has two options:
- Select best social media proxies added earlier (2). Select the proper name from the dropdown list, it is “Astro_1” in the example given.
- Add new IP (3). Follow the steps described in the previous section.
WebRTC complies with proxy IP, but you are free to leave its real value. Click “Create Profile” to finish.

Now you have access to the profile from Proxy manager. Change external IP or refresh status (1), edit profile and its characteristics (2) here.
Geo targeted proxies offered by Astro are compatible with the Octo Browser antidetect multi-account solution. Visit the official page of the project for more information. Buy HTTPS proxy list and enjoy safe multi-accounting access for affiliate marketing, e-commerce, web scraping, and more. Astro and Octo Browser can handle it all.