How to set up Proxifier for Astro (HTTPS + DNS through a proxy)
07 January 2026
Astro is an enterprise-level data gathering infrastructure with residential, mobile, and datacenter proxies, offering geo targeting across 100+ countries. In your Astro dashboard, you can create HTTP(S) or SOCKS5 ports, group ports into custom lists, export a list as a .txt file, and manage IP rotation. If you are just getting started with Astro, you can request a proxy free trial through the Astro Support Team and get test access for your first setup. As part of the trial, Astro credits $3 to your account balance for testing.
To use Astro ports in apps that do not support proxy settings on their own, Proxifier acts as a routing layer on your device. It sends selected app connections through a chosen proxy and lets you keep the rest on a direct route.
Use Proxifier when:
- You want different proxies for different apps or tasks.
- You want DNS lookups to follow the same path as the app traffic.
- Your browser or desktop app cannot use a proxy on its own.
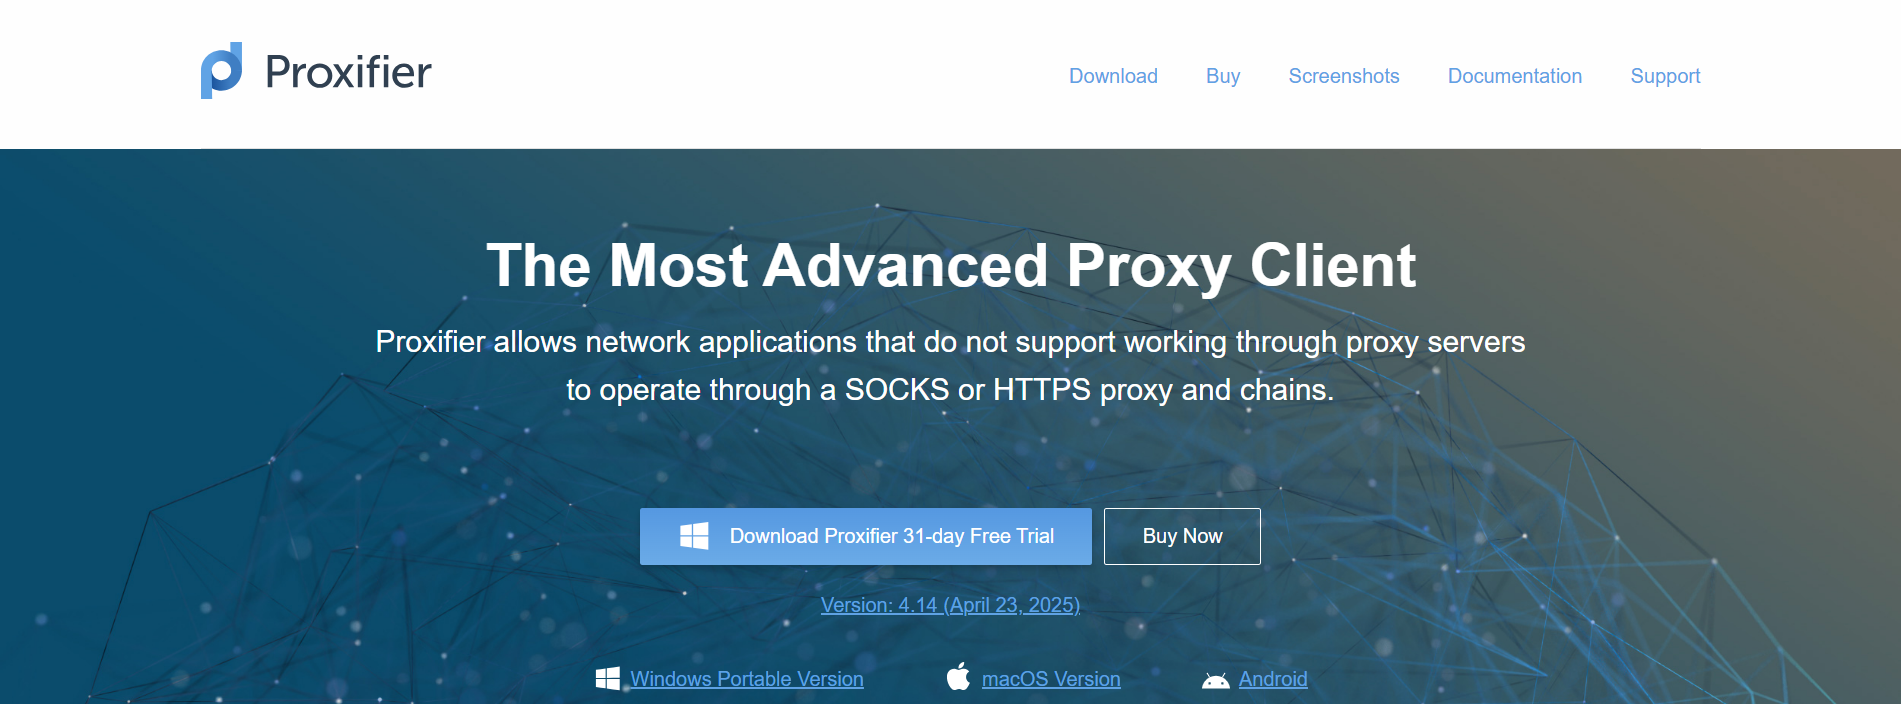
The official Proxifier page: https://www.proxifier.com/
How to set up Astro in Proxifier
Pairing Proxifier with Astro means you can plug Astro IP endpoints into one place and then route any desktop app through them using simple rules. That’s especially handy when you’re using proxies from a reliable provider like Astro. Astro allows you to manage IP rotation from the dashboard (timers, manual updates, API actions, or IP rotation on every request).
1. Open the official Proxifier download page and choose your platform:
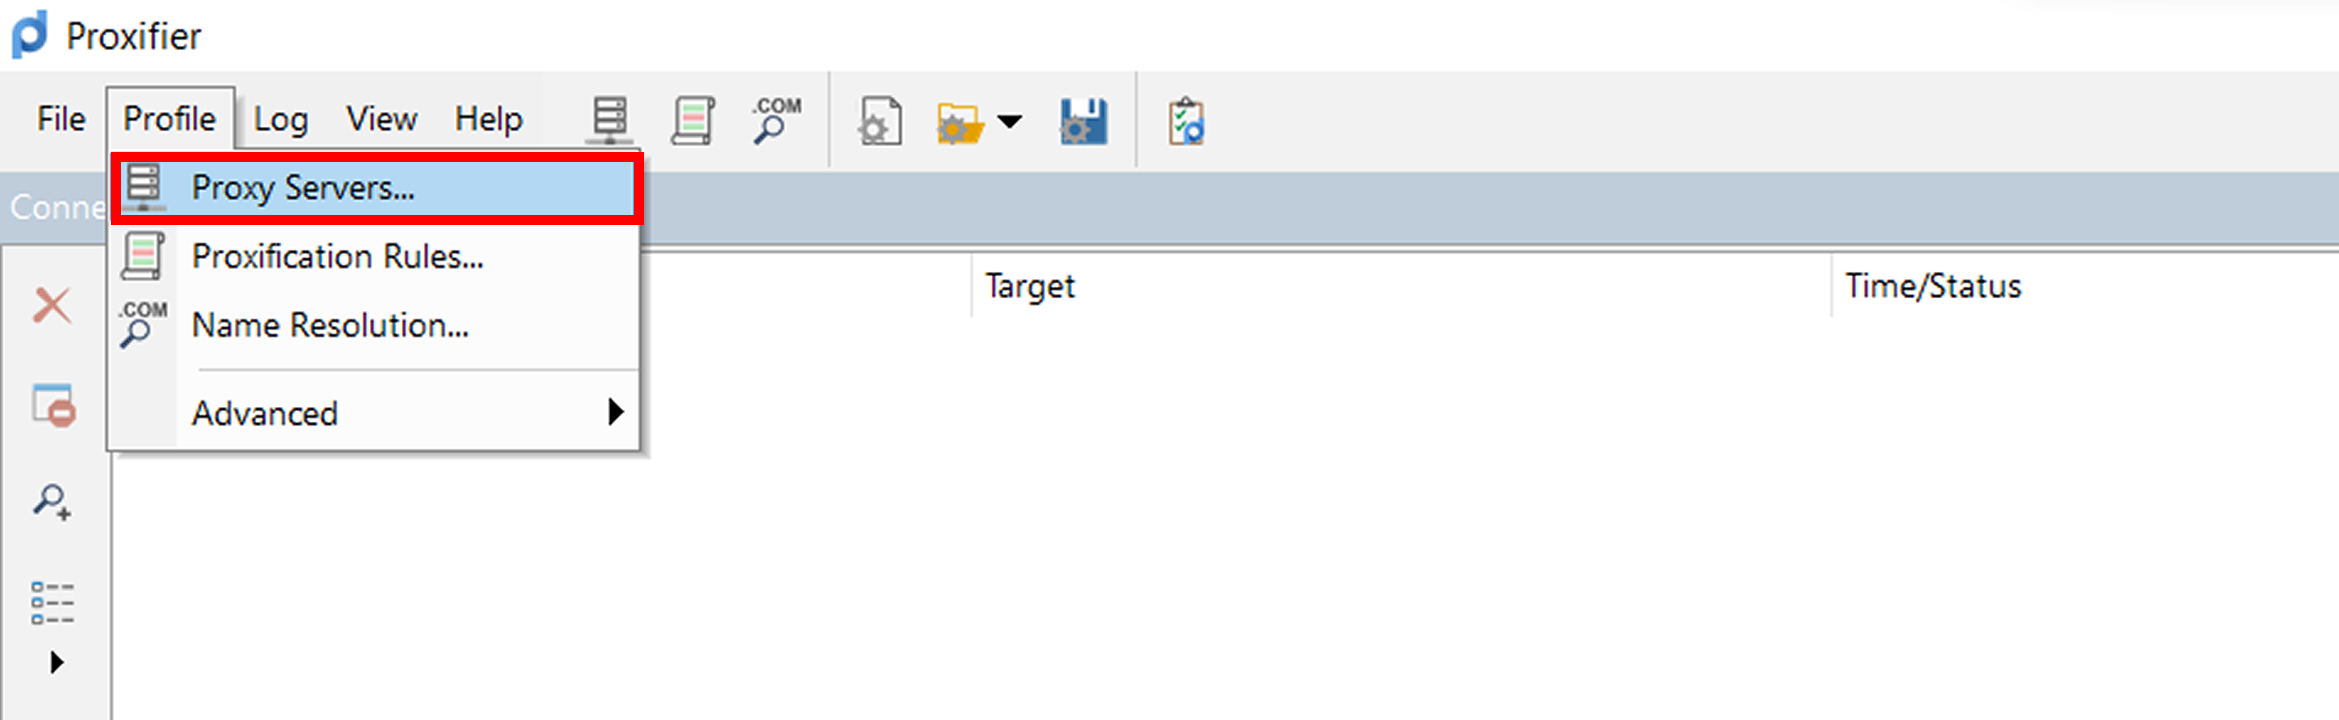
2. Once Proxifier is open, go to Profile and select Proxy Servers.
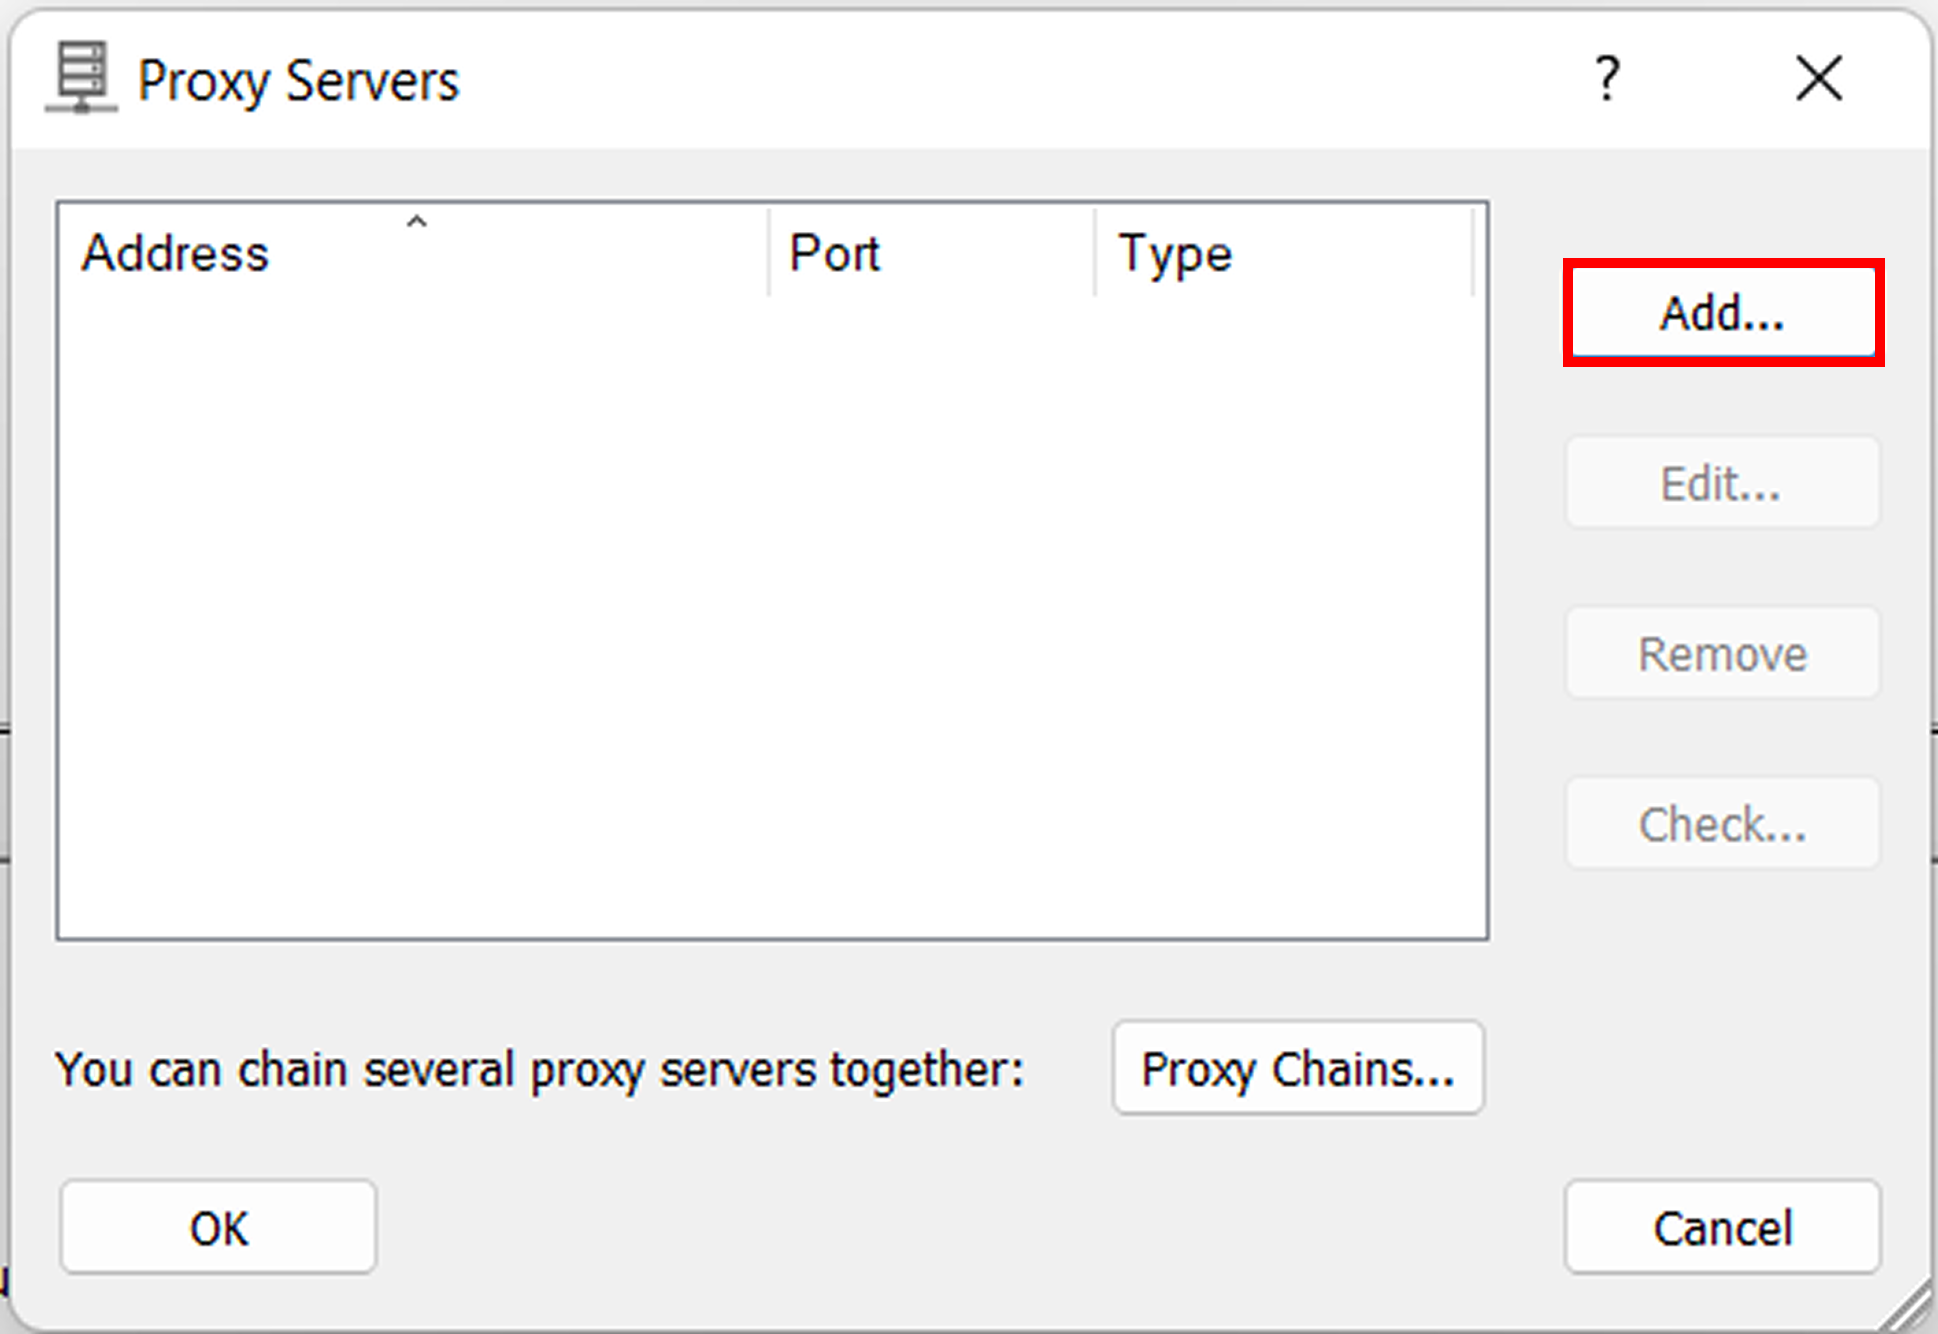
3. In the Proxy Servers window, click Add.
4. Next, open your Astro dashboard and copy the proxy details you need: the IP address and the HTTPS port.
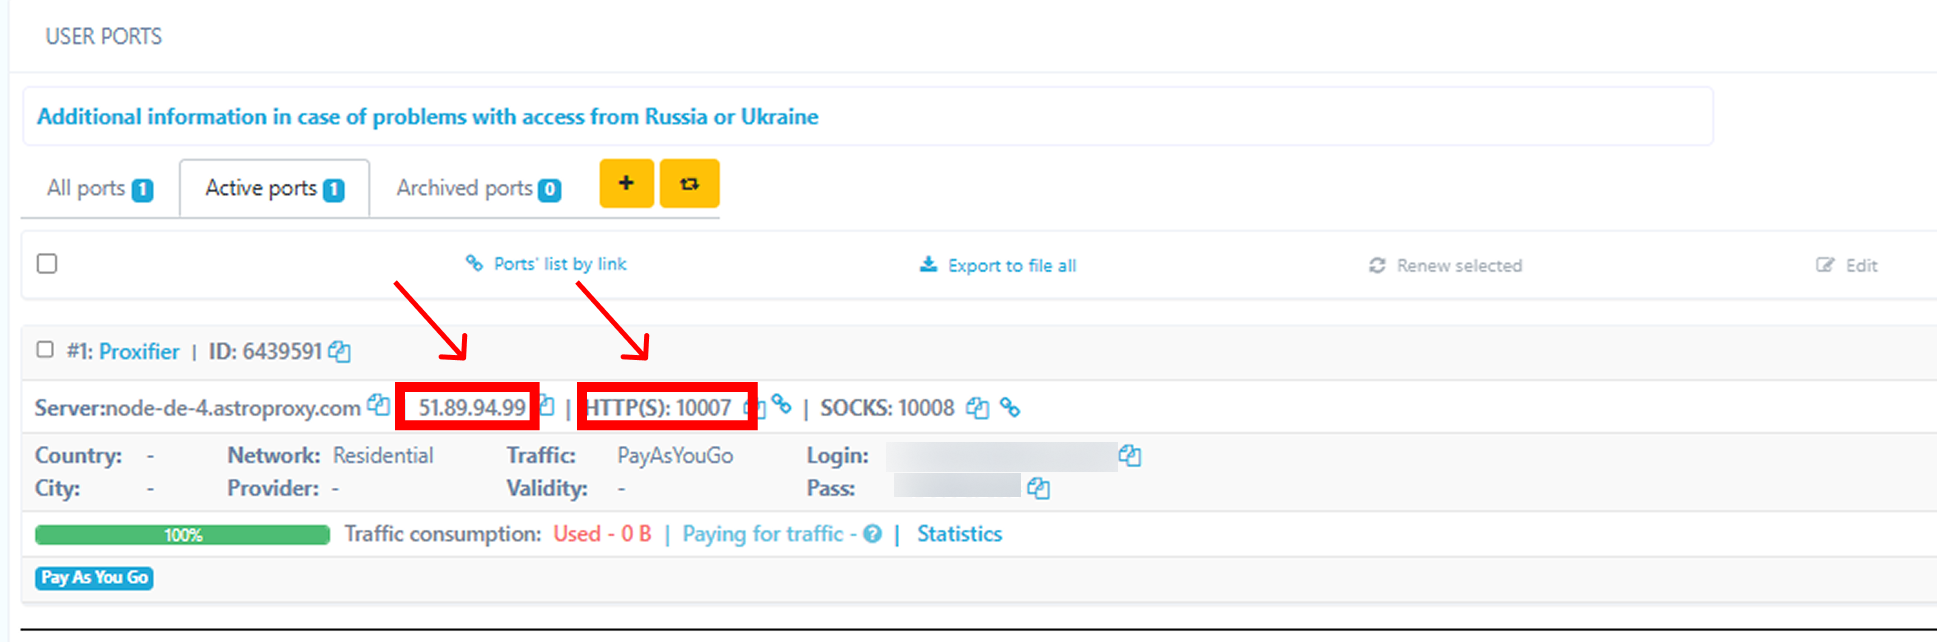
Astro dashboard: IP address and HTTPS port for Proxifier. https://astroproxy.com/en/sign-in
In Proxifier, enter your Astro proxy settings:
- Address: paste the Astro proxy IP address.
- Port: paste the Astro HTTPS port.
- Protocol: select HTTPS.
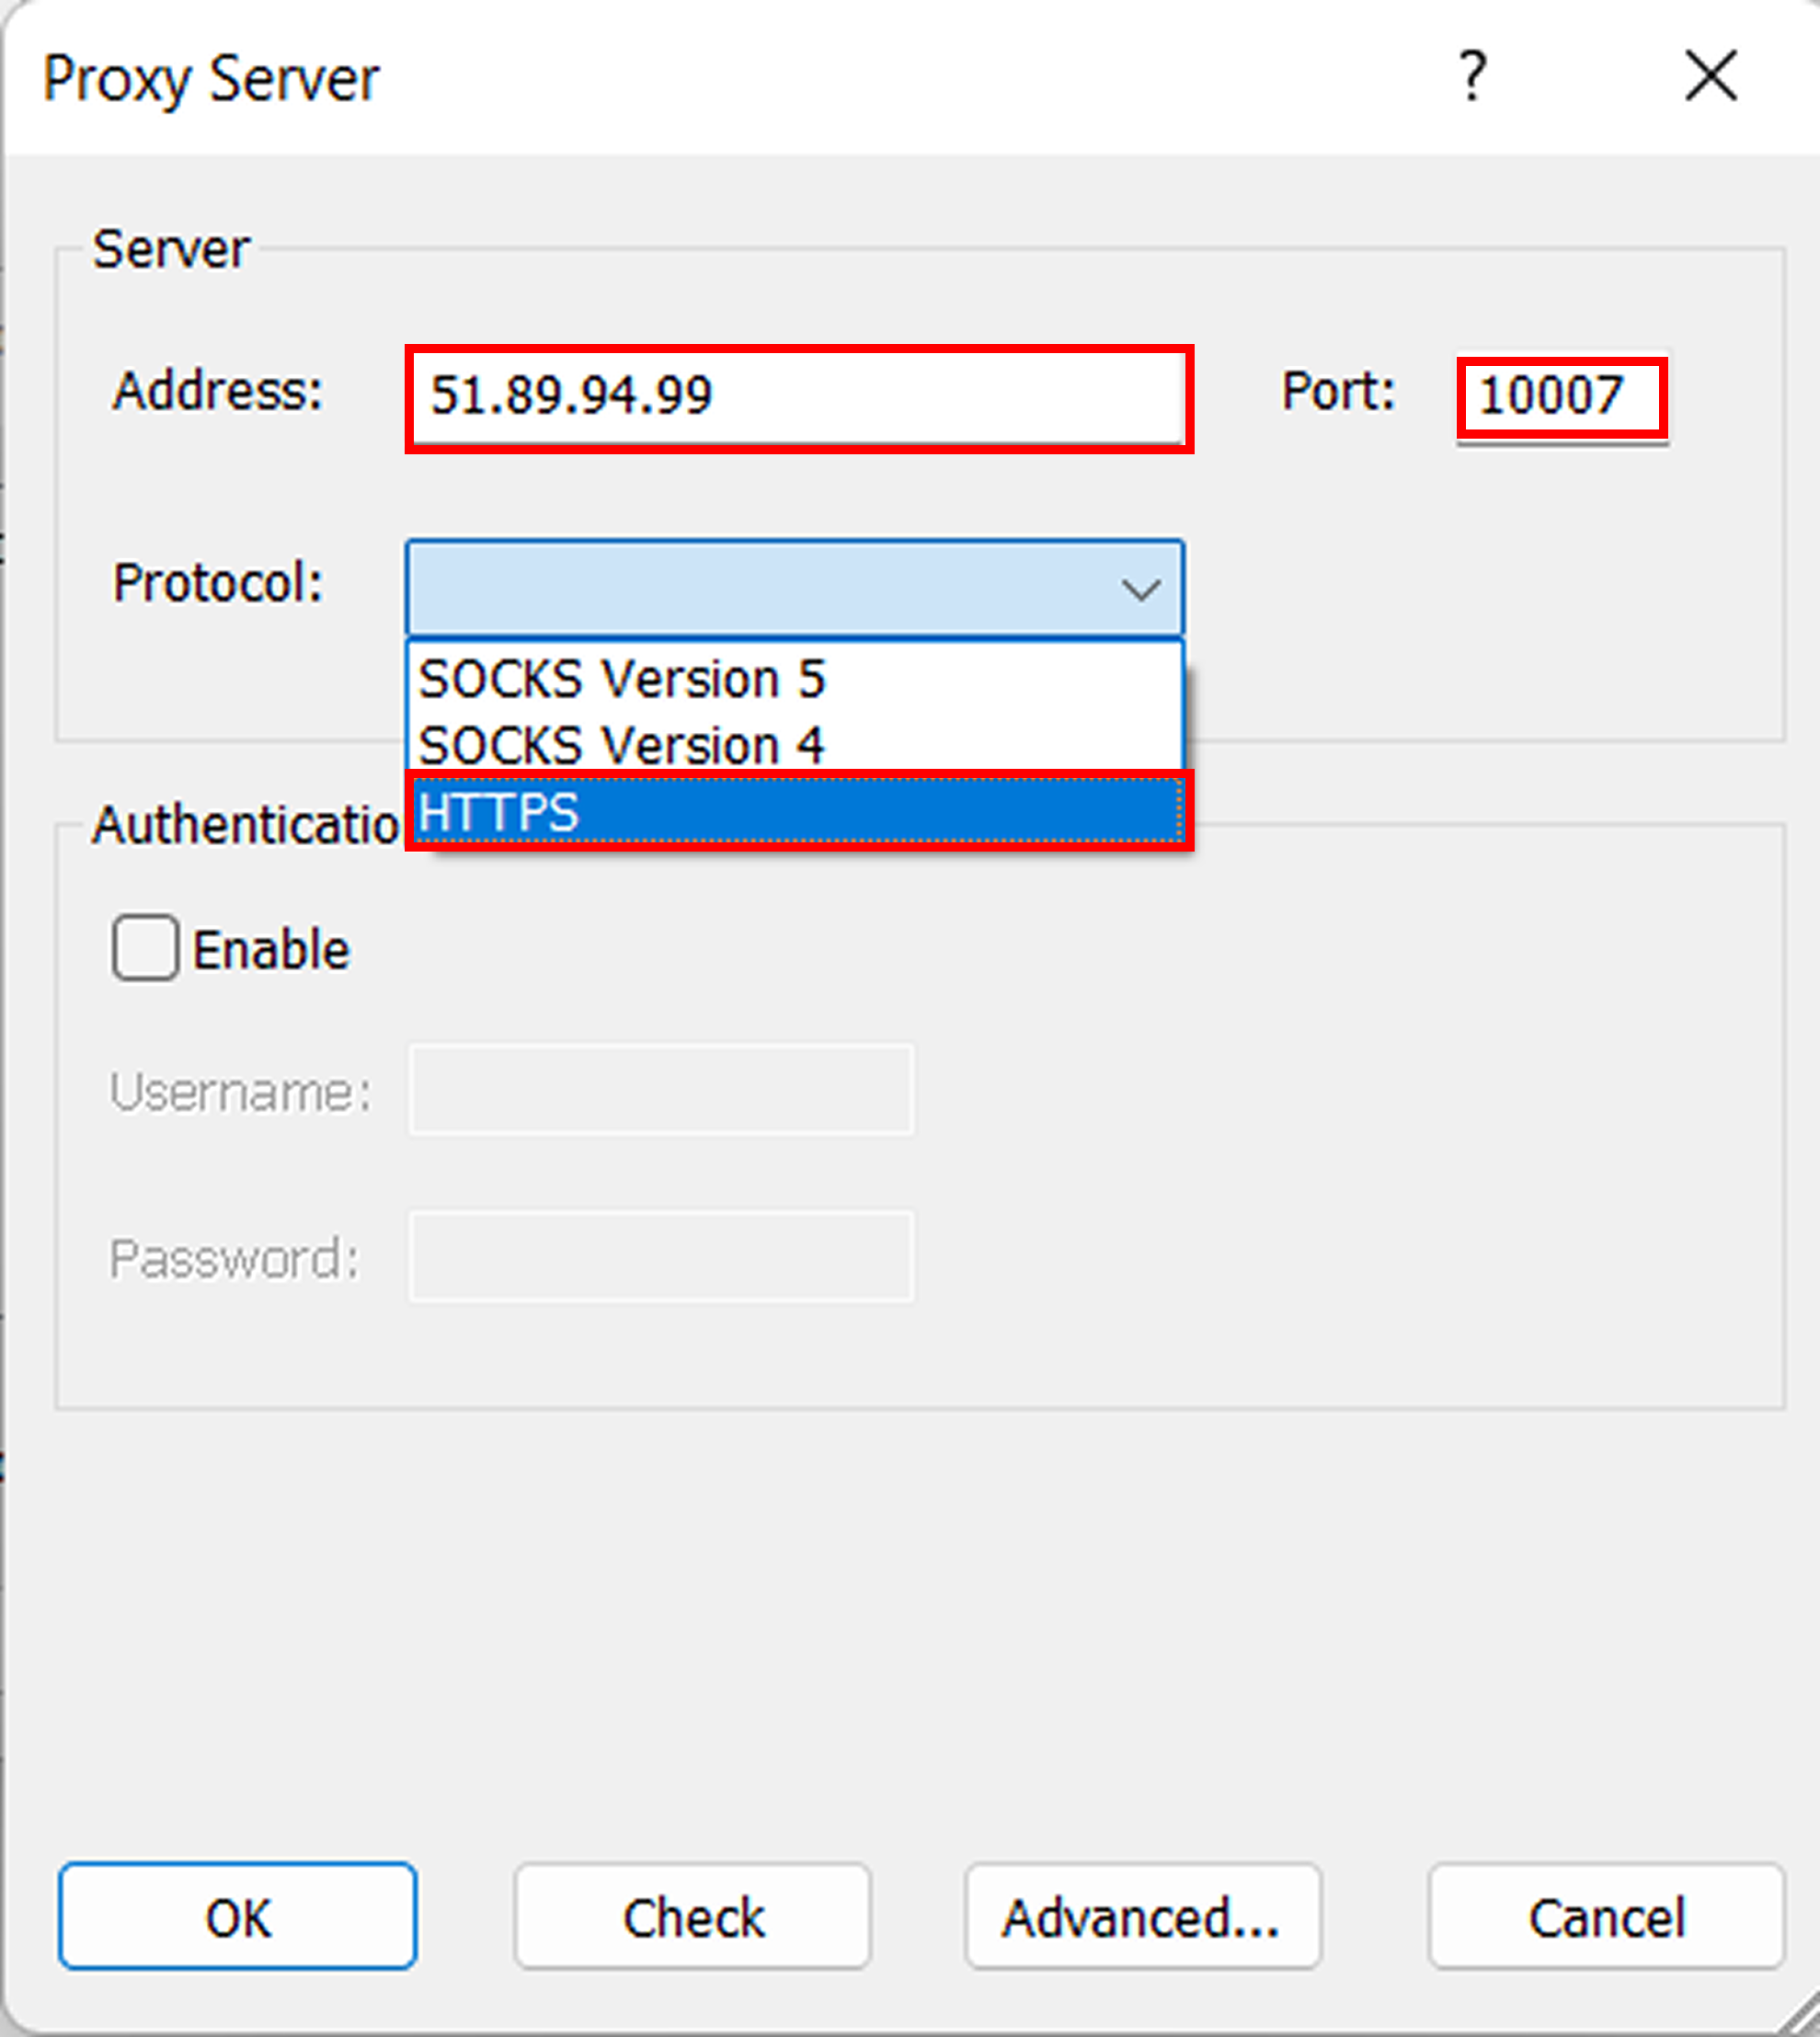
In Proxifier, HTTPS proxies are a practical choice for many web apps, since a lot of tools expect the HTTPS proxy format.
5. In your Astro account, copy the proxy username and password.
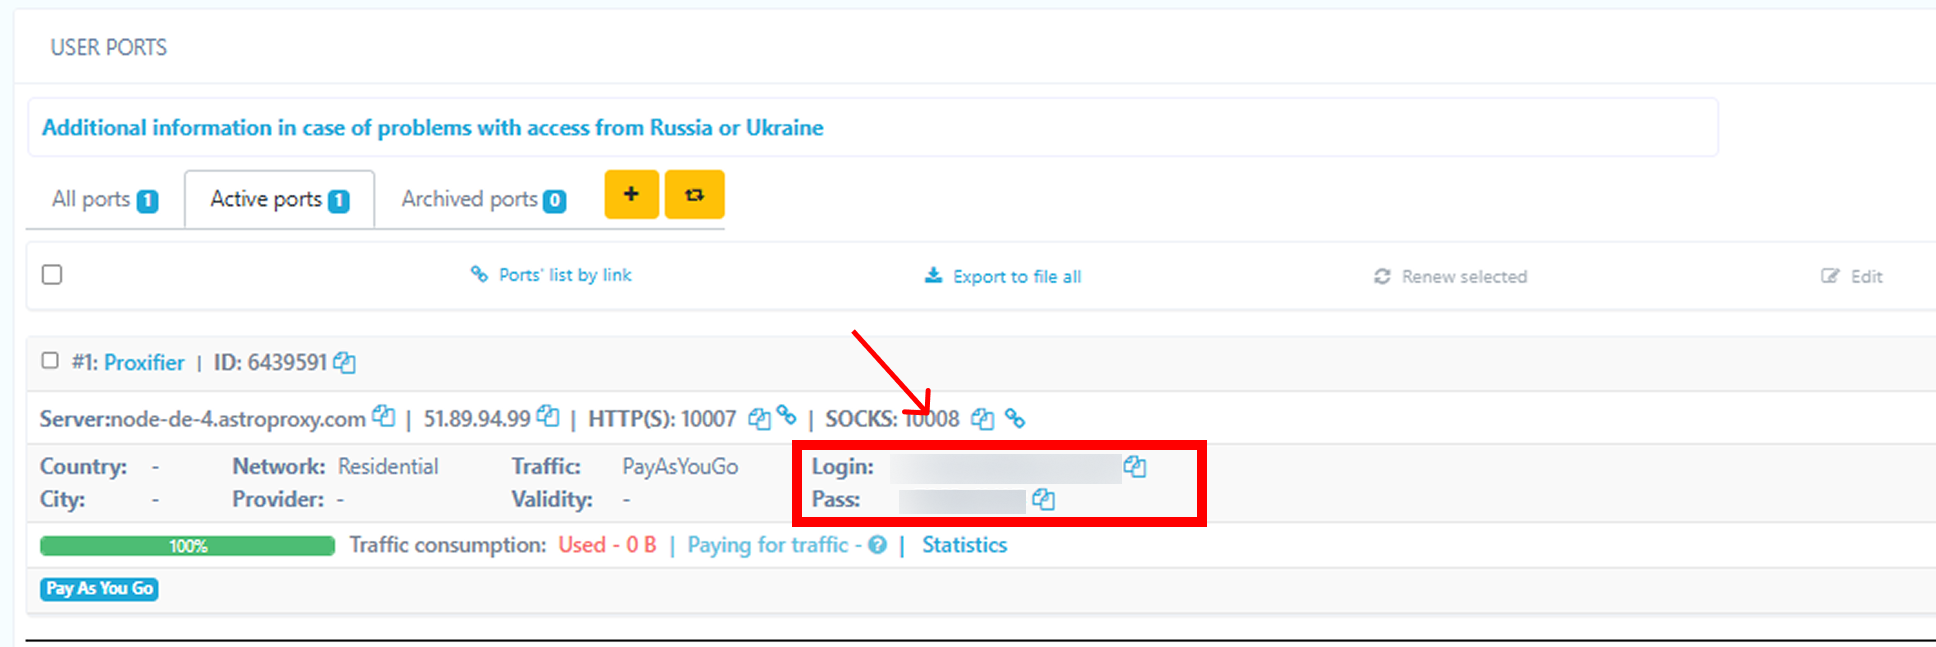
Astro dashboard: Login and Password for Proxifier. https://astroproxy.com/en/sign-in
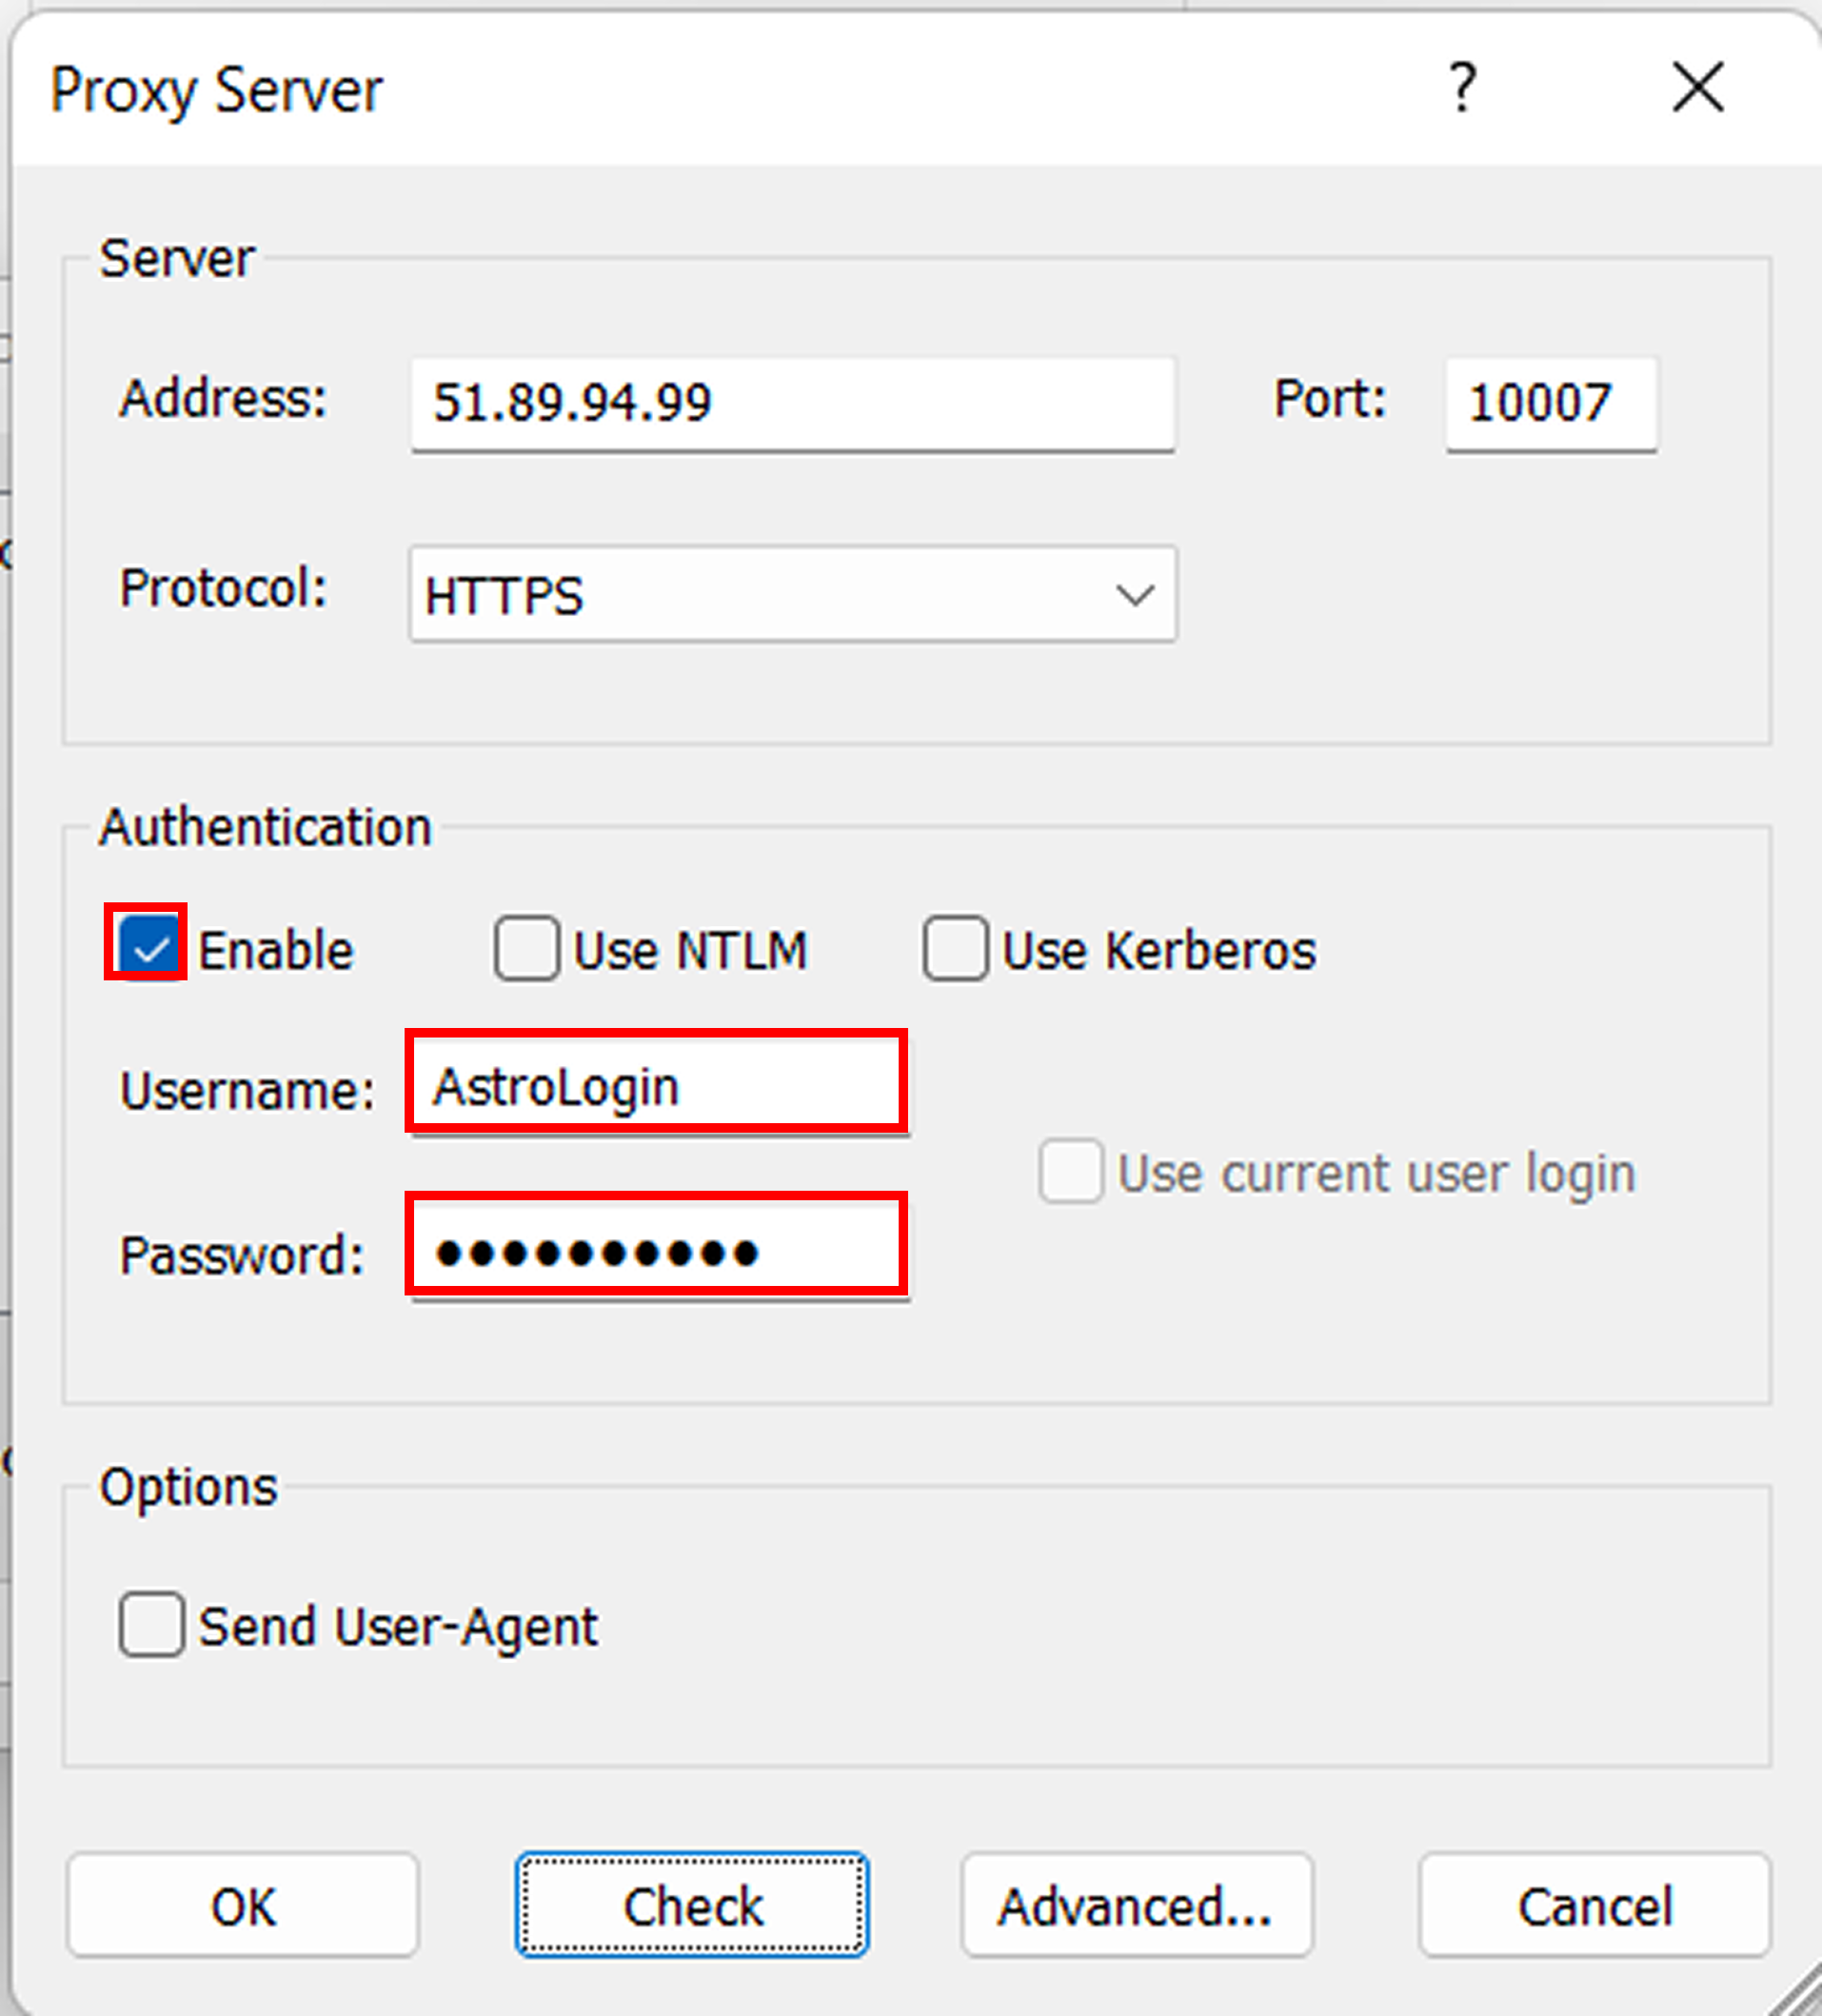
Then, in Proxifier, open the Authentication section:
- Tick Enable.
- Username: paste your Astro login.
- Password: paste your Astro password.
6. Test the proxy connection: click Check.
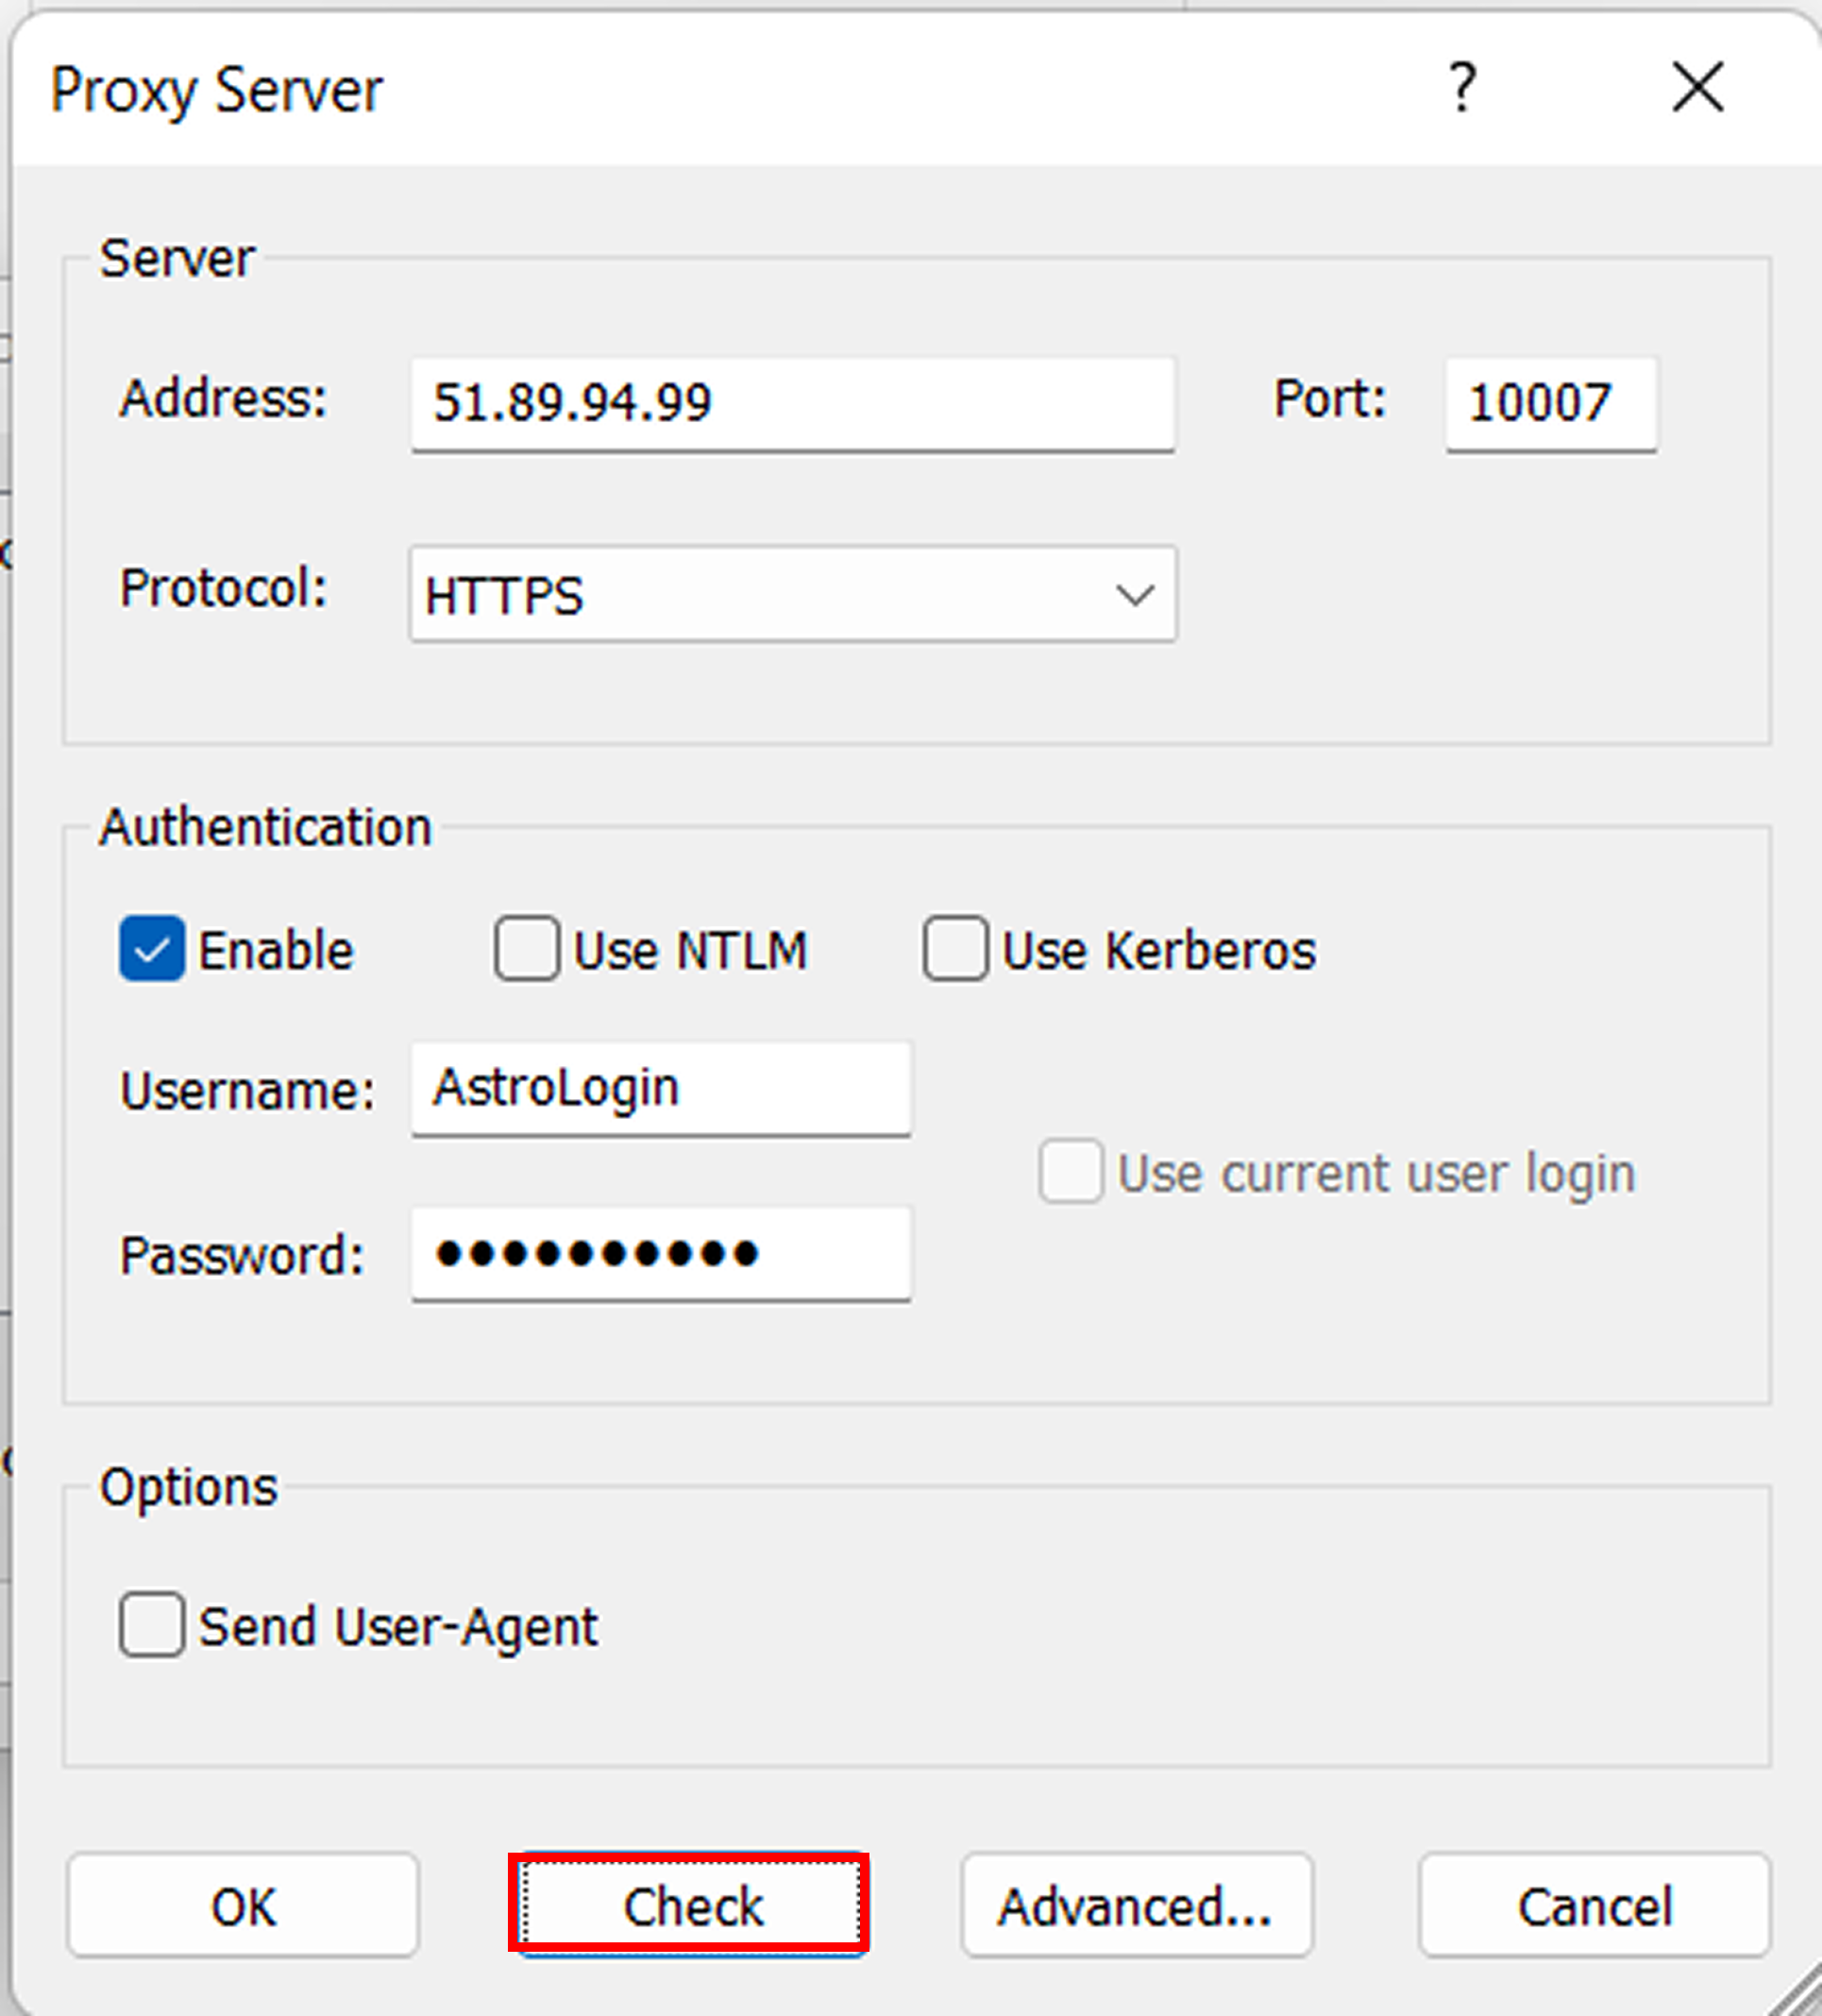
- If you see a success message (green), the proxy is working.
- If the check fails (red), double-check the IP / port / protocol and your Astro username / password.
Also, make sure DNS is set to go through the proxy: open Profile -> Name Resolution and enable Resolve hostnames through proxy.
7. If the test is successful, click OK to save the proxy. When Proxifier asks to use it as the default, confirm to apply it for all apps.
If you set the proxy as the default in Proxifier, it applies to all apps on your device while Proxifier is running. That includes background traffic like app updates.
Route only selected apps through Astro
Sometimes you do not want a system-wide proxy. With Proxifier rules, you can send only one app (for example, a browser) through Astro, while everything else keeps a direct connection.
1. First, make sure Astro is already added: Profile -> Proxy Servers -> Add.
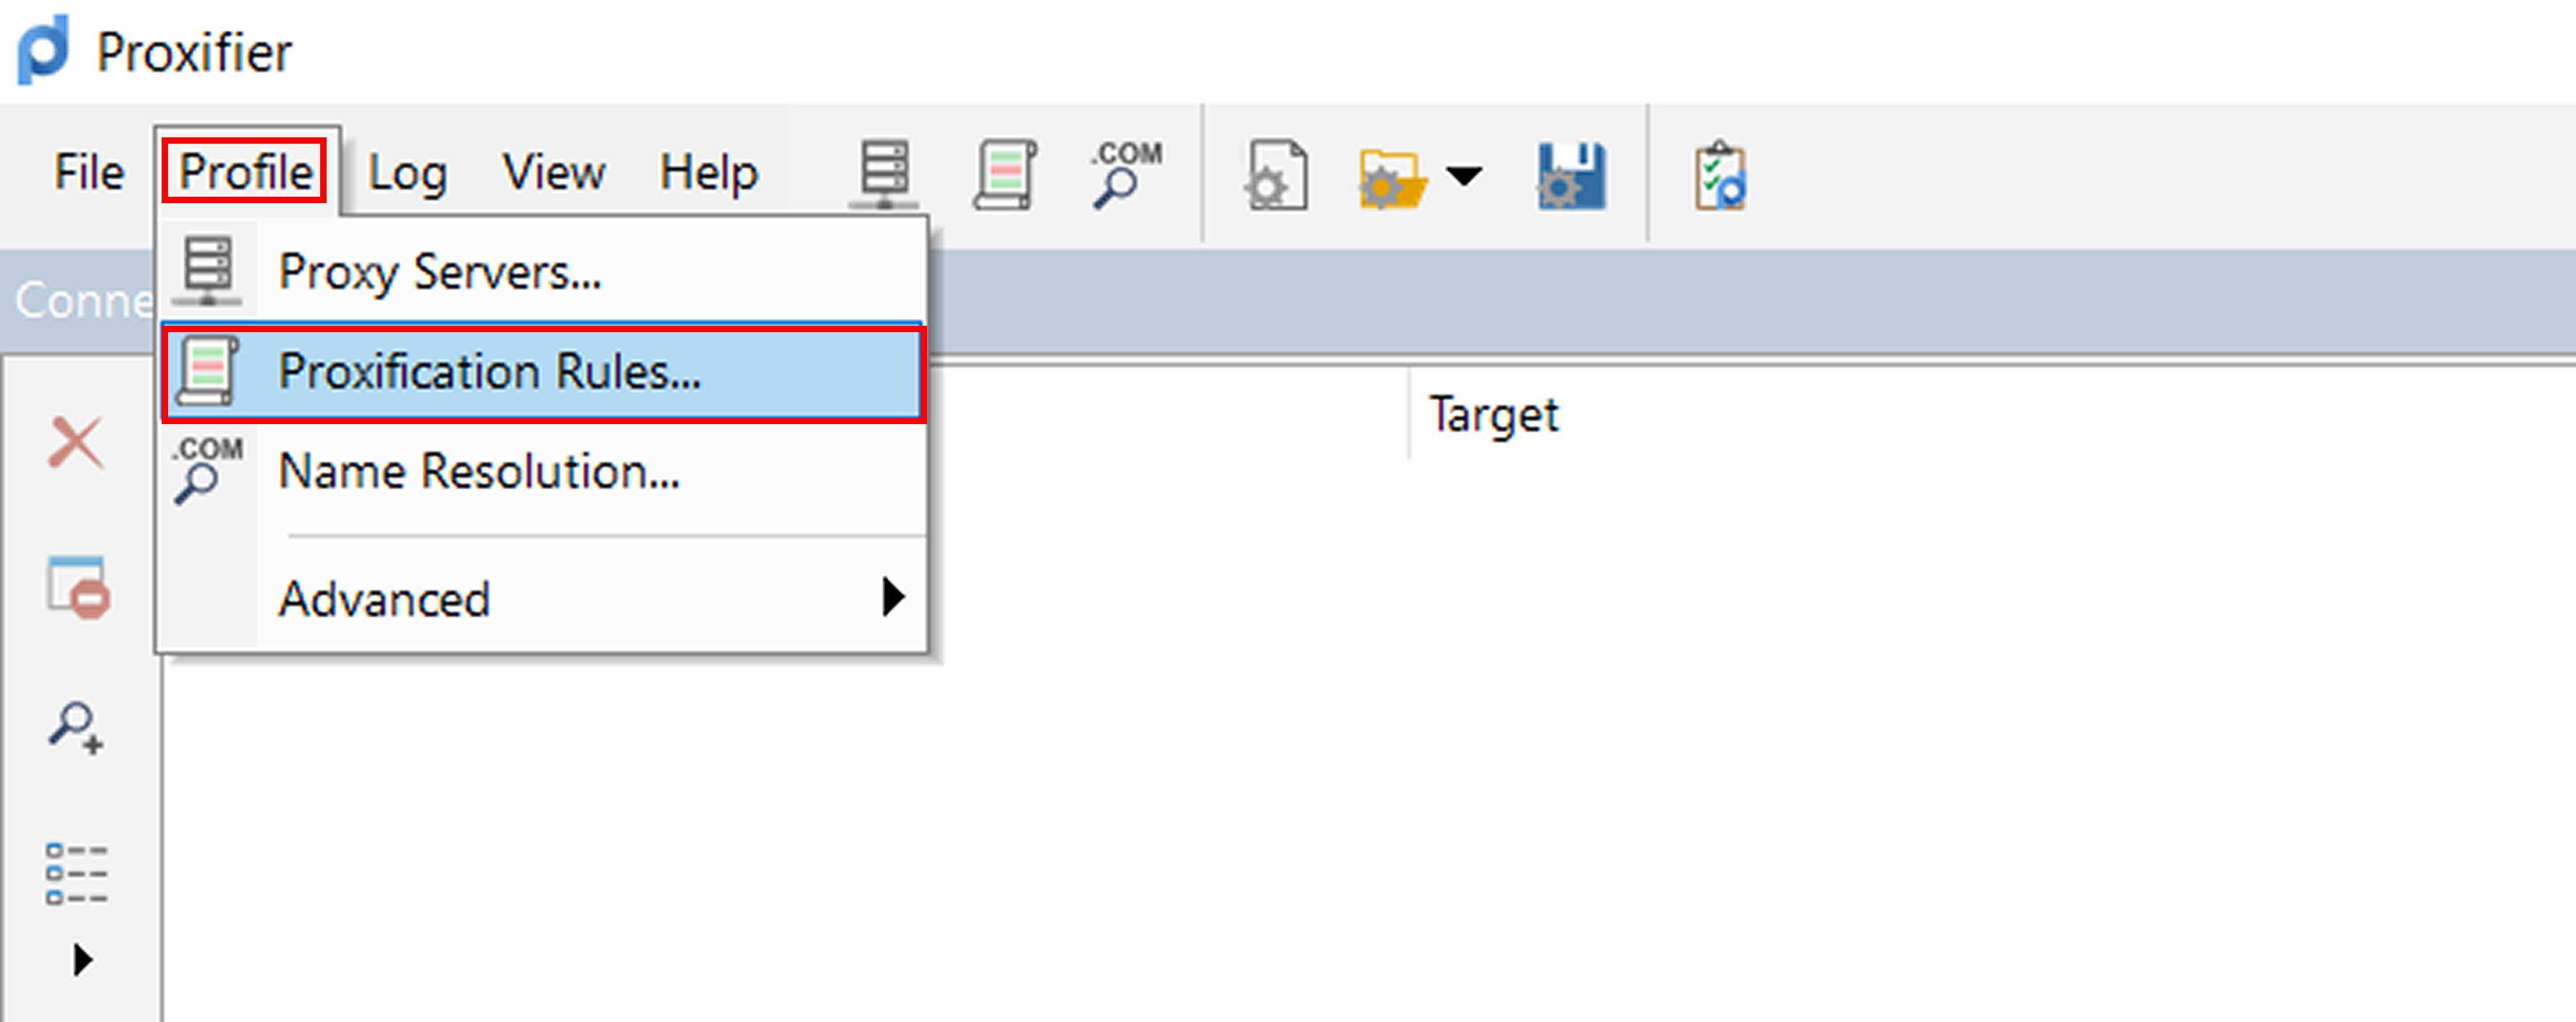
2. Open Profile -> Proxification Rules.
3. Click Add to create a new rule.
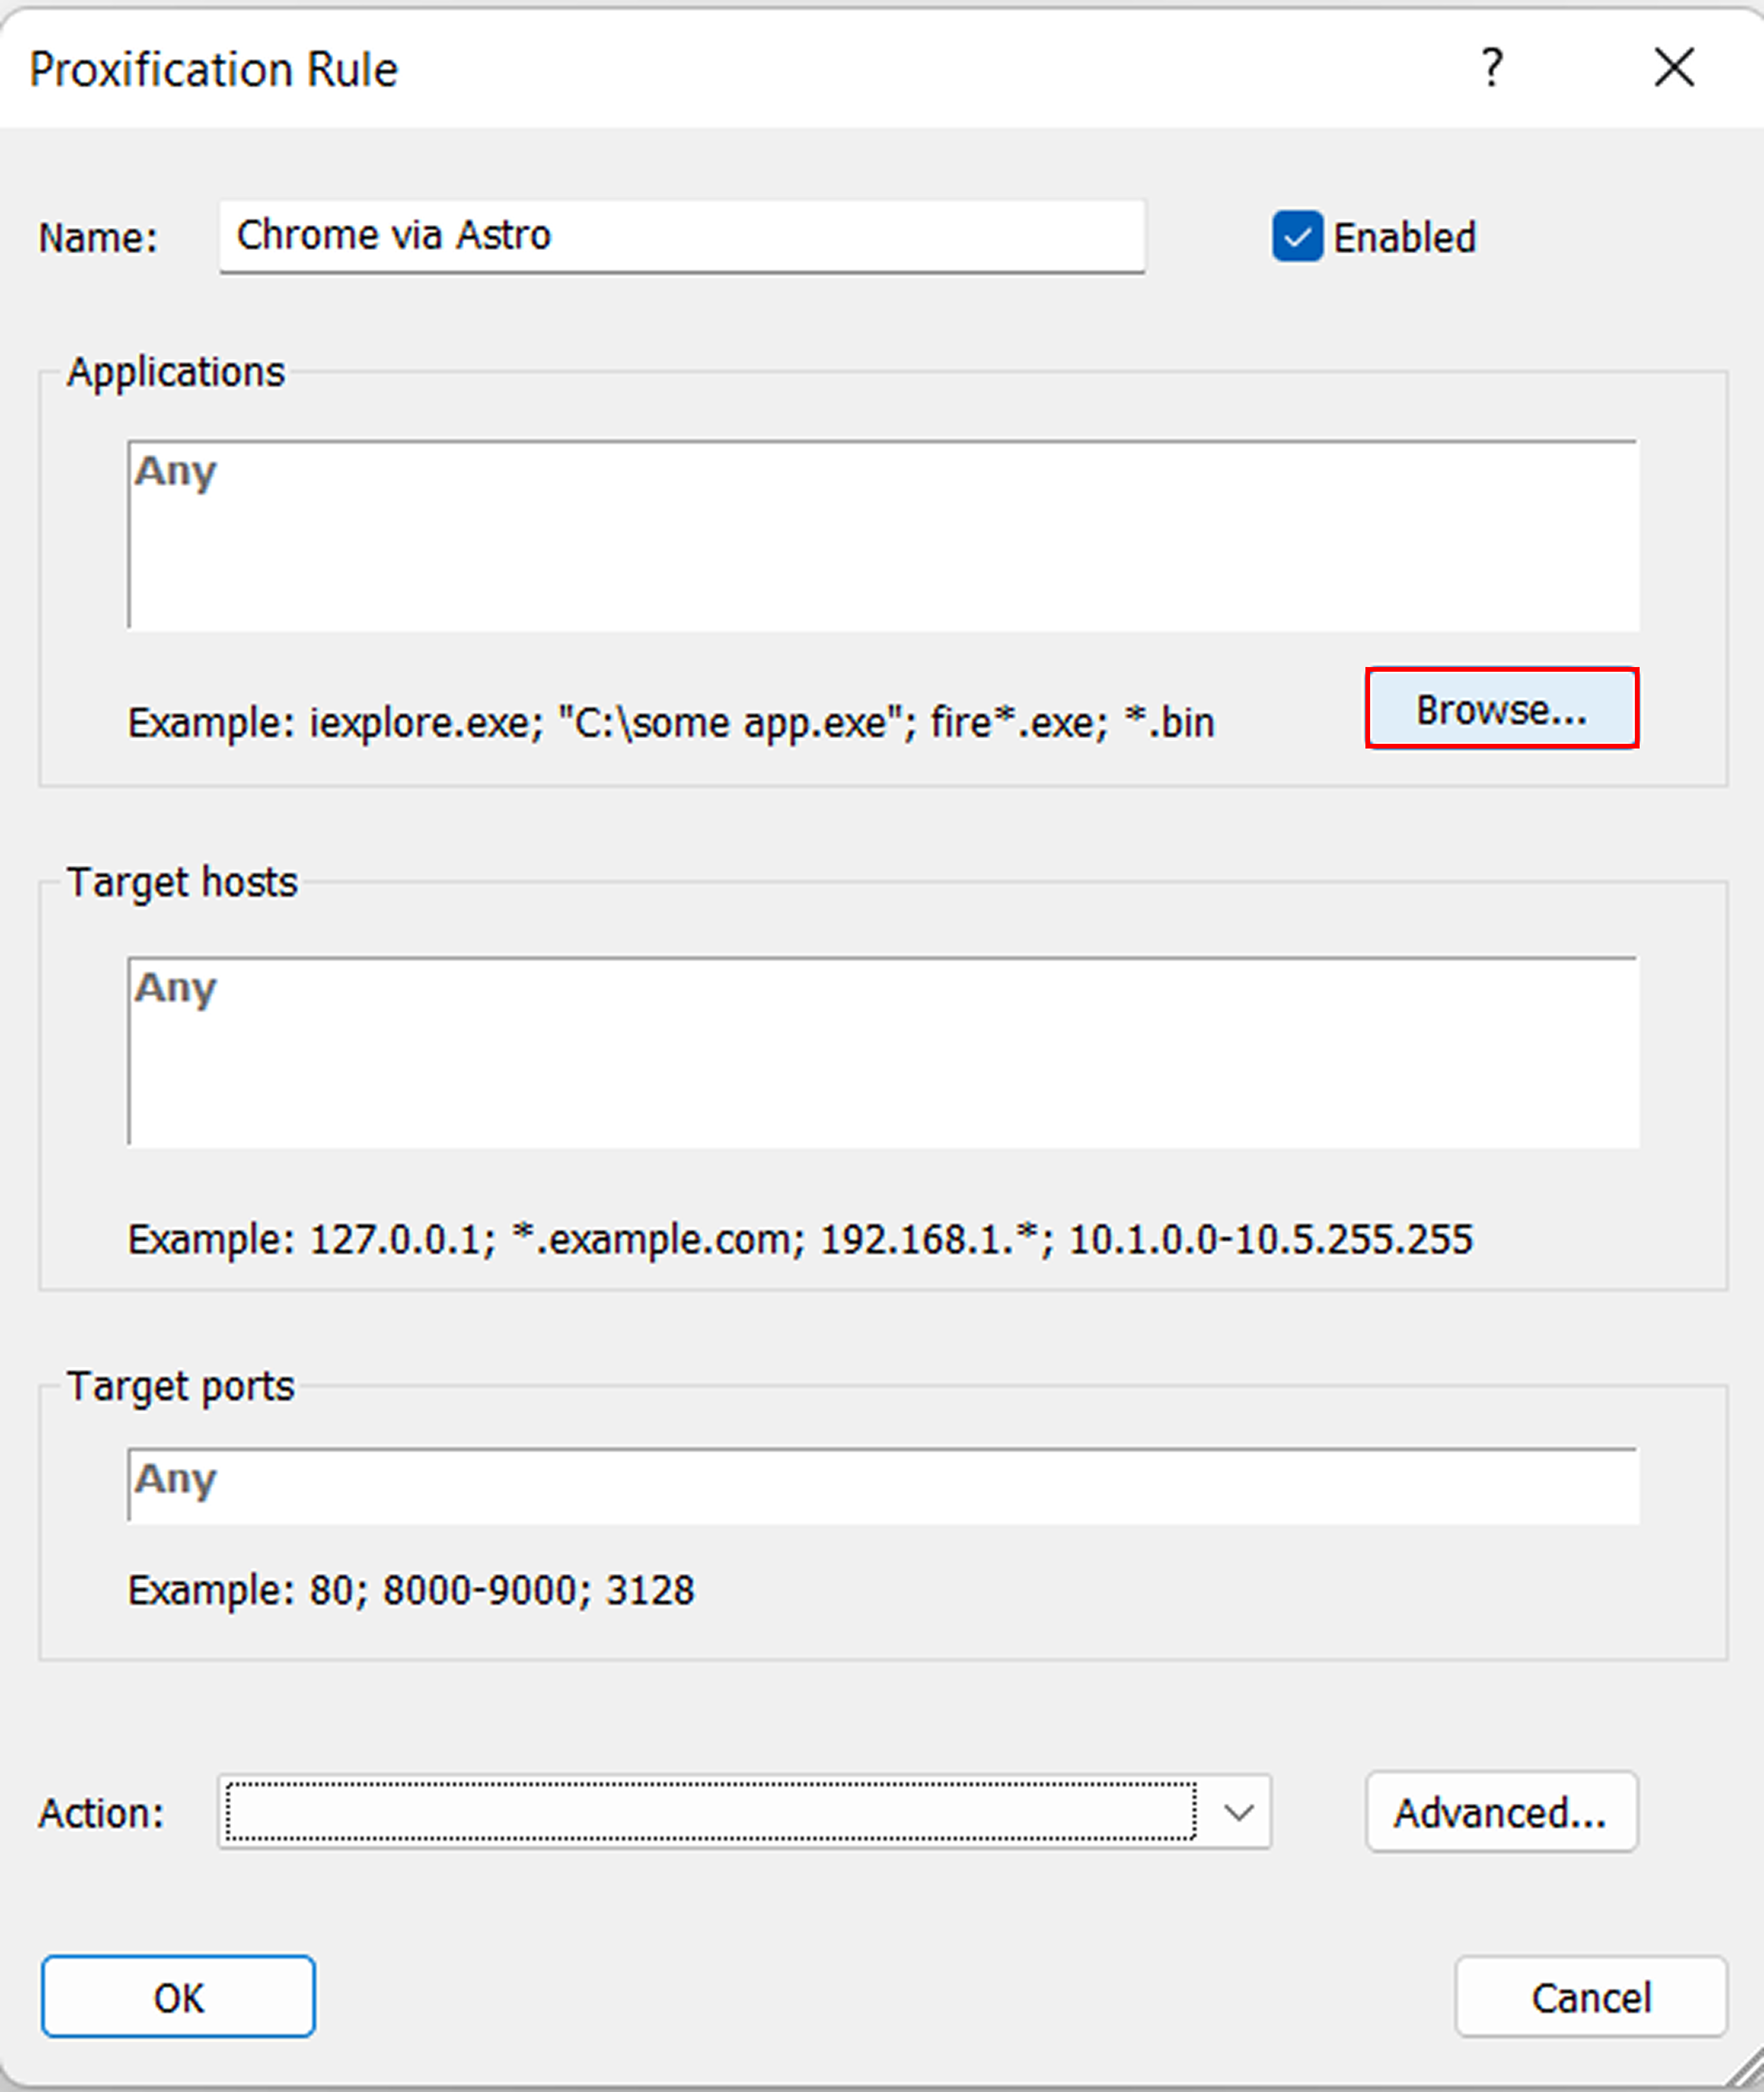
4. Set the rule basics:
- Name: enter any label so you can recognize it later (for example, “Chrome via Astro”).
- Applications: click Browse and select the app file (for example, chrome.exe on Windows).
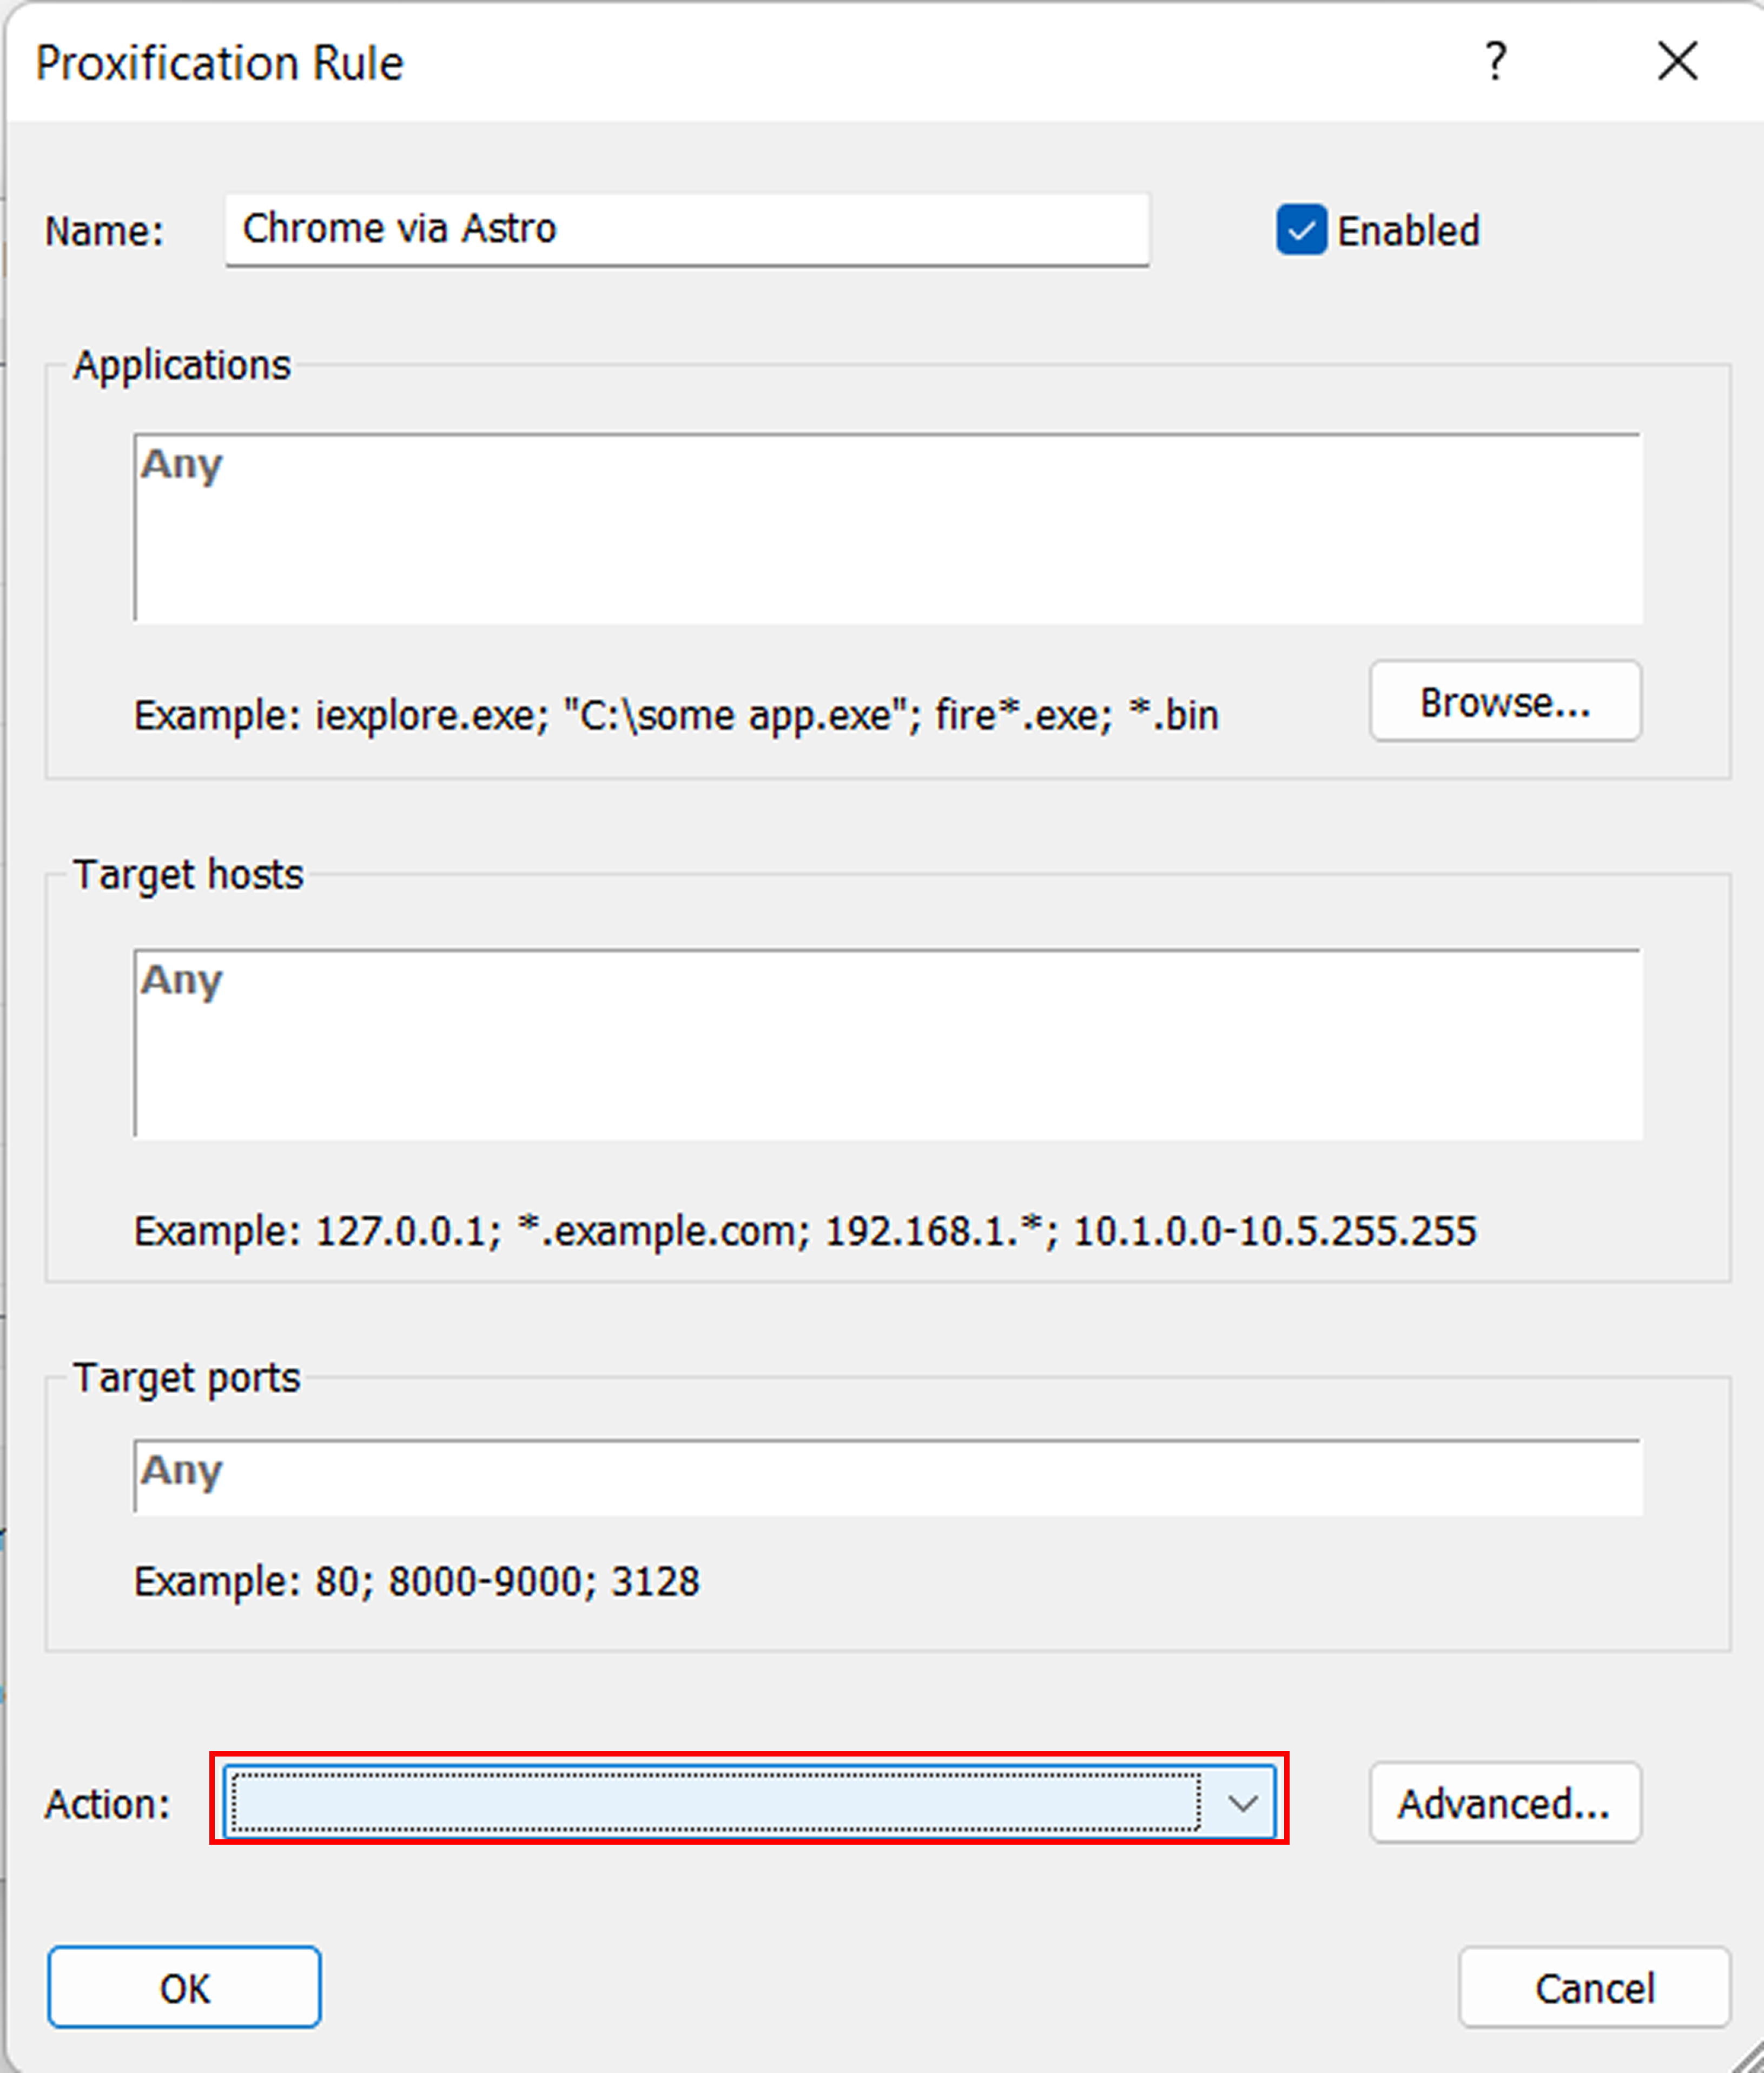
5. In Action, choose your Astro proxy from the list.
6. Click OK to save, then OK again to apply the rules.

After that, only the selected app will use the proxy. Other apps will keep the default “Direct” route unless you add more rules. This is useful if you buy residential and mobile proxies for one specific workflow (e.g., a single browser profile) while keeping the rest of your system on a direct connection.
Proxy types in Astro: which one to pick
With Proxifier configured, Astro becomes a single set of proxy endpoints you can reuse across apps. You add the HTTPS server, run Check, and if name-based sites behave differently, you can enable Resolve hostnames through proxy so DNS follows the same route as the app traffic. From there, you choose how wide the setup is: make the proxy global for the whole system, or build Proxification Rules so only selected programs use it.
If your workflow depends on location, Astro supports geo-targeting across proxy types. You can buy residential and mobile proxies and keep everything organized.
Related questions
-
Proxifier lets apps that don’t have proxy settings send their traffic through an HTTPS proxy, using rules (by app / destination) so you can control what goes through the proxy and what stays direct.
-
Not entirely: it’s free for 31 days (trial), then you need a paid license (official price shows $39.95 for a perpetual license).
-
A proxy is a server that processes internet traffic for an app. Proxifier is a client app that routes other apps’ traffic through a proxy and lets you control which apps use a proxy and which connect directly.